
Brief
This project aims to identify and assemble components for a custom router that can serve as an alternative to standard commercial routers. By employing pfSense software and installing a quad-port Network Interface Card (NIC) into a Small Form Factor (SFF) PC, such as the Lenovo M720q, we can create a custom router. This router can be used for various purposes, including blocking ad servers, and serves as an excellent tool for learning and gaining hands-on experience in network management.
Considerations
- How much compute? – Standard router and firewall do not need that much grunt but maybe we get into IDS/IPS or similar?
- Budget – how much do we want to spend on this?
- M.2 SSD – the NIC will take up the space for the SATA SSD.
- Power usage – what is acceptable? 30W? Comments on the reddit claim 15W or so.
- Managed switch – do we want to add this to the set up?
Parts Needed
This set up worked with the parts I chose. It is a tight fit and starting off with a different mini-PC will mean some research on how to make it work.
You will need:
- Mini PC with a “PCIe” slot onboard – I chose a Lenovo m720q Tiny.
- Intel i350-T4 NIC – reference is 03T8760. https://www.ebay.co.uk/itm/285482522139.
- Tiny baffle plate for the card – this came with the riser.
- Tiny PCIe riser card – PCIEX16 Expansion Graphic Card for ThinkCentre. Part 01AJ902. https://www.ebay.co.uk/itm/394490519429.
- Screwdriver – PH0/PH1 size.
- To make sure your Tiny has the latest BIOS installed – Always best practice.
Lenovo m720q Tiny Specifications
- CPU – i5-9400T 2GHz.
- RAM – 8GB, PC4-2666v, DDR4 SODIMM.
- SSD – 500GB Crucial P3 Plus PCIe NVMe M.2 Gen 4 SSD.
- OS – N/A.
Intel i350 Specifications
- Interface – PCI Express 2.1 (2.5 GT/s or 5 GT/s).
- Ports – Available in single-port, dual-port, and quad-port configurations.
- Ethernet Standards:
- 10BASE-T.
- 100BASE-TX.
- 1000BASE-T (Gigabit Ethernet).
- Data Transfer Rate – Up to 1 Gbps per port.
- Full-duplex operation
- Jumbo Frames – supported (up to 9.5 KB).
- TCP/IP Offload Engine – (TOE).
- IPv4 and IPv6 – supported.
- Wake-on-LAN – supported.
- VLANs (IEEE 802.1Q) – supported.
- Link aggregation (IEEE 802.3ad) – supported.
- Operating temperature range – 0°C to 55°C.
- Typical power consumption:
- i350-T2 (dual port): 2.8W.
- i350-T4 (quad port): 4.4W.
- OS Support – Windows, Linux, and FreeBSD.
pfSense Requirements
- CPU – 64-bit x86-64 processor.
- RAM – Minimum 1GB, recommended 2GB+.
- Storage – 8GB+ for installation, more for logs/packages.
- Network interfaces – At least 2 NICs. Impossible to install otherwise.
- Compatible hardware – Check pfSense hardware compatibility list.
- Virtualization support – (if running as VM).
- BIOS/UEFI – with hardware virtualization enabled.
Installing the 4 Port NIC
This is a simple process of fitting the i350 into the m720q using the riser card:
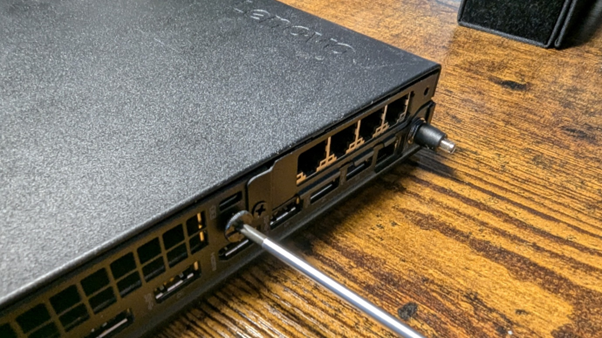
With the cover for the m720q removed undo the screws for the original baffle
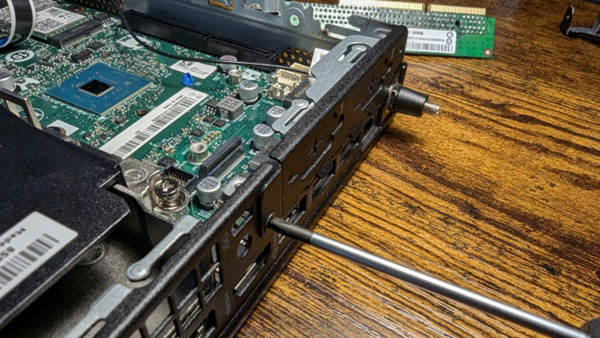
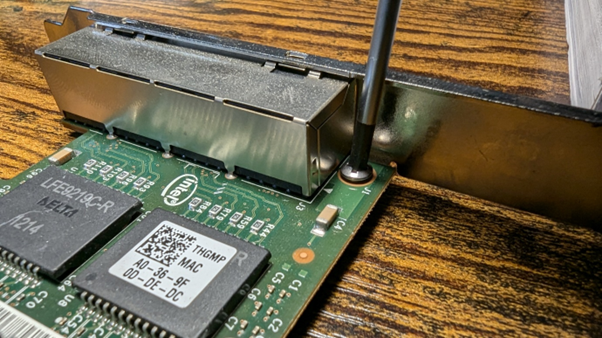
Remove the plate from the i350
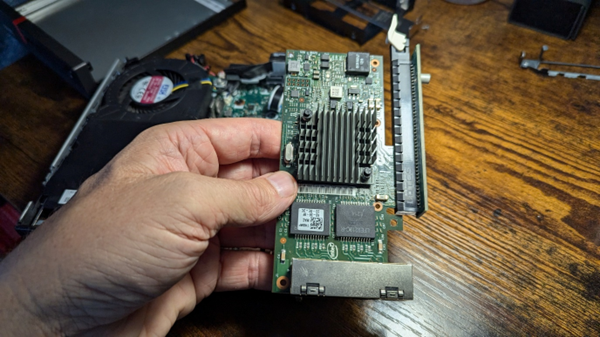
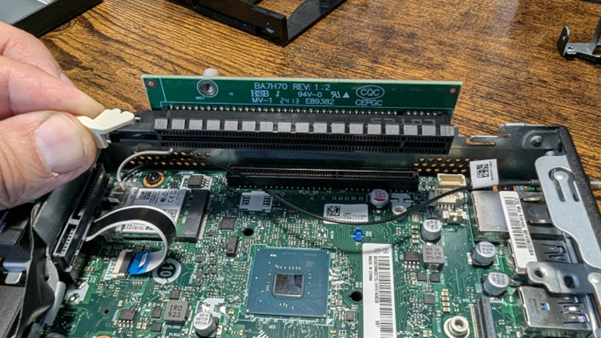
Fit the i350 into the riser
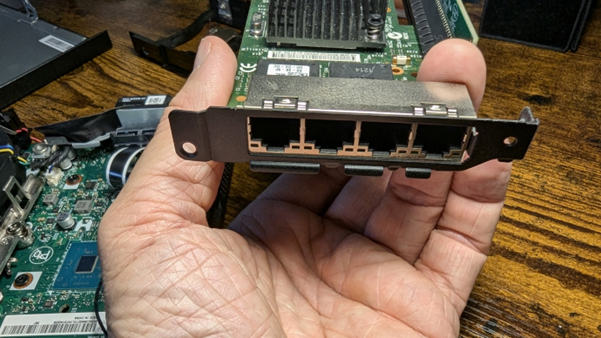
Fit the new baffle onto the i350
This is the orientation of the riser when it is installed
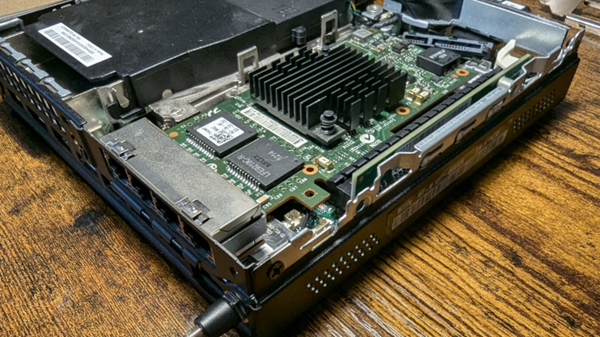
The i350 in place
Replace the screws for the baffle and replace the cover
Installing pfSense
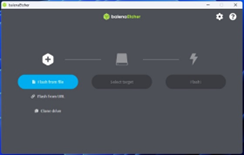
- Download pfsense from their website.
- Use a tool like Balena Etcher or Rufus (Linux) to create a USB installer.
- Insert the USB into the m720q.
- Insert or have ready the ethernet cables for your WAN and LAN.
- Reboot into the BIOS/UEFI or boot menu (Lenovo is F1).
- Choose Full Install.
- Select Destination Drive.
- Choose ZFS.
- Choose RAID 0 – no redundancy.
- Choose interfaces for WAN and LAN.
- At this point you can use AutoDetect and you may need to remove and replace the ethernet cables.
- Wait for the installation to complete.
- Remove installation media.
- Allow the system to reboot.
- Use a browser to access the webConfigurator.

- Default credentials.
- admin
- pfsense
- Check that the latest version has been installed.

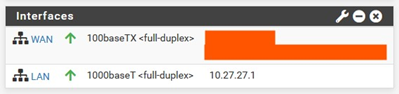
- Check that the interfaces have IP addresses. (My public IP hidden)
- Set Up DHCP for the LAN.
- Choose a private address range such as 10.40.40.1/24
- On the machine that you were using to access the webConfigurator, which is on the LAN side of the pfsense machine, you will need to release and renew the DHCP lease.
- ipconfig /release and then ipconfig /renew (windows).
- sudo dhclient -r and then sudo dhclient (linux).
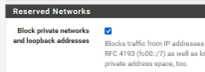
- IF you are using this as a device inside your SOHO network and the WAN interface is a private IP address supplied by the DHCP server on the SOHO router then you will need to uncheck the Block private networks and loopback addresses option in the Reserved Networks section of WAN interface configuration page.
- Change the default admin credentials for the webConfigurator.
Finishing Up
Now that we have the pfsense up and running we can start playing with it. You can add widgets to the dashboard such as traffic graphs and you can add firewall rules and so much more.
Building your own router with pfSense on a compact PC like the Lenovo m720q is a great way to learn about networking and create a setup that’s just right for you. This project lets you get hands-on with network hardware, tweak software settings, and explore advanced routing features. In the end, you might find that your custom router works better, is more secure, and can do more than off-the-shelf routers.