I own a MeLE Quieter HD3 Mini PC which is an inexpensive but useful fanless mini desktop PC. One of its features is an SD Card slot. This has never worked but it didn’t bother me much until recently when I needed to transfer video files to a computer from an SD Card.
I needed to fix this problem.
The Immediate Issue
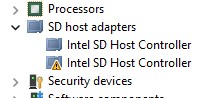
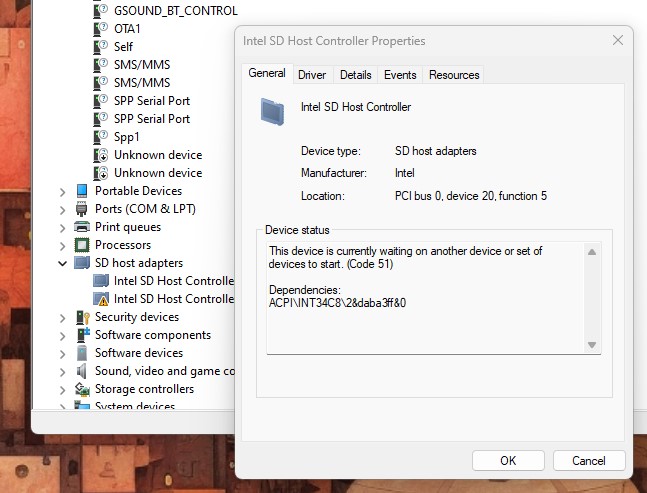
Looking in the Device Manager I could clearly see that the SD Host Controller did not have a working driver.
However, when I tried to update the driver or try uninstalling it and rebooting the system I would receive the response:
Working It Out
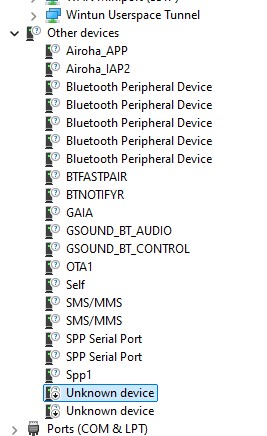
I tried for a good while to find this device without luck until I received a response from the manufacturer with the information that this device would present as an unknown device with the Hardware ID INT34C8. I needed to install the driver for this device before the Intel SD Host Controller would function. Knowing this information, I was able to find the device in Device Manager under Other devices:
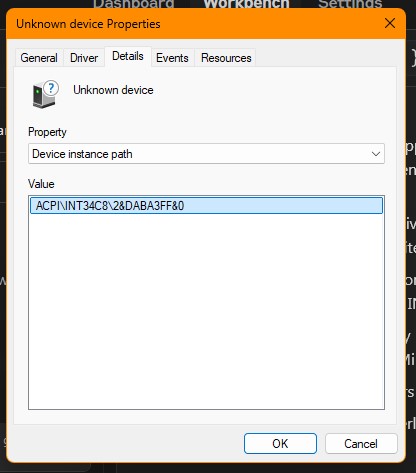
INT34C8 is in the device instance path.
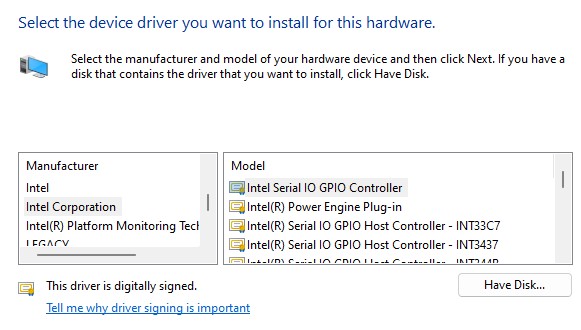
With the help of Google and Anthropic I was able to find out that this was an Intel Serial IO GPIO Host Controller. So, I tried updating the driver using Device Manager in the usual fashion:
But, unsurprisingly, INT34C8 wasn’t listed and so I needed to go and find this driver. Looking for drivers online is a bit of a minefield there is a site on the Microsoft domain that VirusTotal passes as clean. https://www.catalog.update.microsoft.com/Search.aspx?q=INT34C8
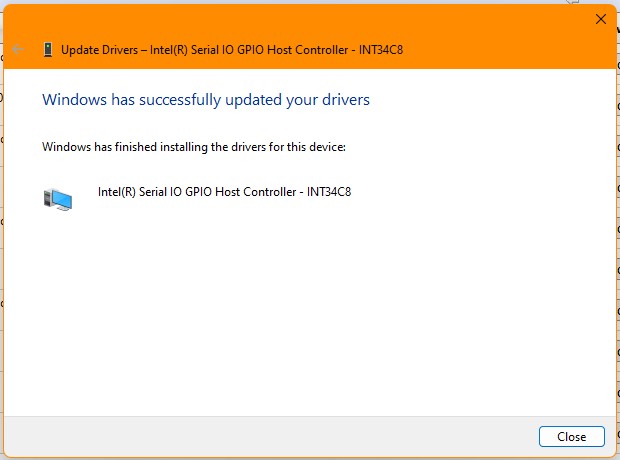
This provided a list of ‘System’ drivers so I chose the first one, for Windows 10 and later. A Cabinet File was downloaded and I opened that. Going back to Device Manager I chose once again to update the driver and then pointed at the C:\Users\tim folder. After a moment or two the installation was declared successful:
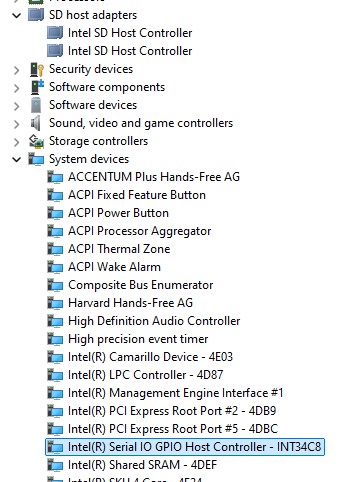
Looking in Device Manager confirmed that not only was the INT34C8 device working but also the SD Host Controller:
Conclusion
The crucial piece of information in this troubleshoot was finding the INT34C8 device and it was only when MeLE support let me know that this was going to show as an Unknown Device with Hardware ID INT34C8 that I was able to fix this problem.
The time for a new PC is approaching. Primarily this will be my main PC and for IT labbing and VMs. For years I have used Intel CPUs but AMD have been proving themselves as the superior chip maker in this department so I want to give them a shot with the next desktop. In two days they will be releasing the 9000 series with Ryzen 9 9950X, Ryzen 9 9900X, Ryzen 7 9700X and the Ryzen 5 9700.
Low power draw is high on my list so I am interested in the Ryzen 7 9700X. With an expected RRP of around £300 and a TDP of 65W it ticks a lot of boxes.
Specification
Details
Architecture
Zen 5 (Granite Ridge)
Cores
8
Threads
16
Base Clock
3.8 GHz
Max Boost Clock
Up to 5.5 GHz
L1 Cache
512 KB
L2 Cache
8 MB
L3 Cache
32 MB
TDP
65W
Manufacturing Process
TSMC 4nm FinFET
Socket
AM5
Supported Memory
DDR5
PCIe Version
5.0
That’s a lot of fives.
Performance
The Ryzen 7 9700X is designed for high-performance desktop computing, particularly for gaming and productivity tasks. Based on benchmarks, it shows significant improvements over its predecessors and competitive performance against Intel’s latest offerings:
Single-Core Performance: In CPU-z, it scored 863 points in single-core tests and 2218 points in Cinebench R23 single-core tests.
Multi-Core Performance: It scored 8237 points in CPU-z multi-core tests and 20,125 points in Cinebench R23 multi-core tests.
Gaming Performance: It is expected to perform well in gaming, with AMD claiming improvements over Intel’s 14900K by 4% to 23% in gaming and 7% to 56% in productivity tasks.
Key Features
Zen 5 Architecture: Offers a 16% improvement in Instructions Per Clock (IPC) over Zen 4, enhancing both gaming and productivity performance.
Energy Efficiency: Initially rated at 65W TDP, though there are considerations to revise this to 120W to boost gaming performance further.
Overclocking Support: The processor is unlocked for overclocking, allowing enthusiasts to push its performance further.
Advanced Memory and I/O: Supports DDR5 memory and PCIe 5.0, ensuring compatibility with the latest hardware and peripherals.
Is it right for Virtualisation and Productivity?
The AMD Ryzen 7 9700X appears to be well-suited for virtualization workloads and general IT cybersecurity tasks and learning. Here’s why:
Virtualization Support: The Ryzen 7 9700X supports AMD-V, which is AMD’s hardware virtualization technology. This greatly improves virtual machine performance, making it ideal for running multiple VMs simultaneously.
Core Count and Threading: With 8 cores and 16 threads, this CPU provides excellent multitasking capabilities. This is crucial for running multiple VMs concurrently, which is common in lab environments and cybersecurity testing scenarios.
Clock Speeds: The base clock of 3.8 GHz and boost clock up to 5.5 GHz offer strong single-threaded performance, which is beneficial for tasks that don’t scale well across multiple cores.
Cache: The Ryzen 7 9700X features 32 MB of L3 cache, which can help improve performance in various workloads, including virtualization.
Modern Architecture: Built on the Zen 5 (Granite Ridge) architecture using a 4 nm process, this CPU incorporates the latest improvements in AMD’s processor technology.
Memory Support: It supports DDR5 memory, which can provide faster data access for memory-intensive VM workloads.
PCIe Support: With PCIe 5.0 support and 24 lanes, it offers high-speed connectivity for storage and other peripherals, which can be crucial for VM performance.
Combine this CPU with fast RAM and storage and I think it will a good solid workhorse for my intentions. On top of that AMD have shown exceptional commitment to the AM4 socket which is still being supported and bodes well for the longevity of an AM5 motherboard.
On the face of it it appears to be a good choice, although I am a little weary of the TDP jump to 120W. This is marketed as a gaming CPU and that is the last thing I will be doing on this machine. Might there be better options?
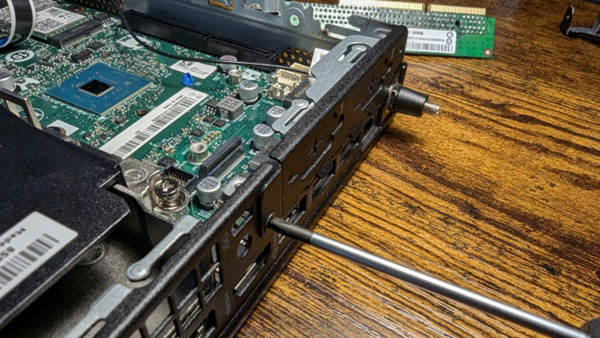
This project aims to identify and assemble components for a custom router that can serve as an alternative to standard commercial routers. By employing pfSense software and installing a quad-port Network Interface Card (NIC) into a Small Form Factor (SFF) PC, such as the Lenovo M720q, we can create a custom router. This router can be used for various purposes, including blocking ad servers, and serves as an excellent tool for learning and gaining hands-on experience in network management.
Considerations
How much compute? – Standard router and firewall do not need that much grunt but maybe we get into IDS/IPS or similar?
Budget – how much do we want to spend on this?
M.2 SSD – the NIC will take up the space for the SATA SSD.
Power usage – what is acceptable? 30W? Comments on the reddit claim 15W or so.
Managed switch – do we want to add this to the set up?
Parts Needed
This set up worked with the parts I chose. It is a tight fit and starting off with a different mini-PC will mean some research on how to make it work.
You will need:
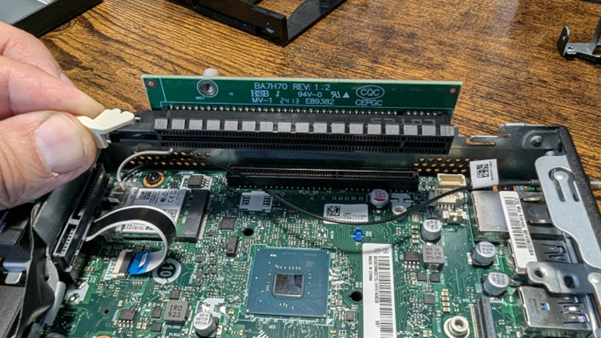
Mini PC with a “PCIe” slot onboard – I chose a Lenovo m720q Tiny.
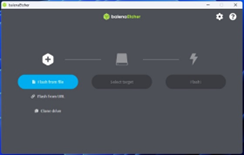
Use a tool like Balena Etcher or Rufus (Linux) to create a USB installer.
Insert the USB into the m720q.
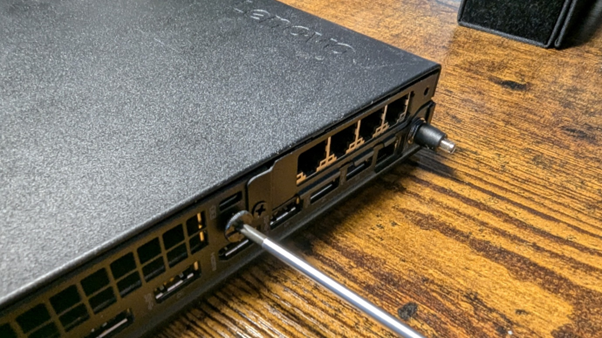
Insert or have ready the ethernet cables for your WAN and LAN.
Reboot into the BIOS/UEFI or boot menu (Lenovo is F1).
Choose Full Install.
Select Destination Drive.
Choose ZFS.
Choose RAID 0 – no redundancy.
Choose interfaces for WAN and LAN.
At this point you can use AutoDetect and you may need to remove and replace the ethernet cables.
Wait for the installation to complete.
Remove installation media.
Allow the system to reboot.
Use a browser to access the webConfigurator.
Default credentials.
admin
pfsense
Check that the latest version has been installed.
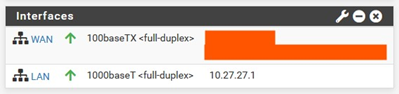
Check that the interfaces have IP addresses. (My public IP hidden)
Set Up DHCP for the LAN.
Choose a private address range such as 10.40.40.1/24
On the machine that you were using to access the webConfigurator, which is on the LAN side of the pfsense machine, you will need to release and renew the DHCP lease.
ipconfig /release and then ipconfig /renew (windows).
sudodhclient -r and then sudodhclient (linux).
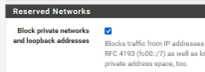
IF you are using this as a device inside your SOHO network and the WAN interface is a private IP address supplied by the DHCP server on the SOHO router then you will need to uncheck the Block private networks and loopback addresses option in the Reserved Networks section of WAN interface configuration page.
Change the default admin credentials for the webConfigurator.
Finishing Up
Now that we have the pfsense up and running we can start playing with it. You can add widgets to the dashboard such as traffic graphs and you can add firewall rules and so much more.
Building your own router with pfSense on a compact PC like the Lenovo m720q is a great way to learn about networking and create a setup that’s just right for you. This project lets you get hands-on with network hardware, tweak software settings, and explore advanced routing features. In the end, you might find that your custom router works better, is more secure, and can do more than off-the-shelf routers.
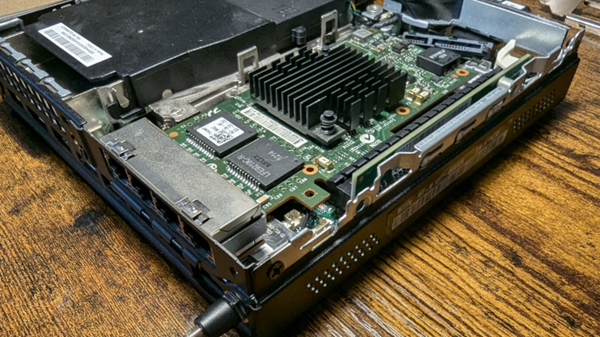
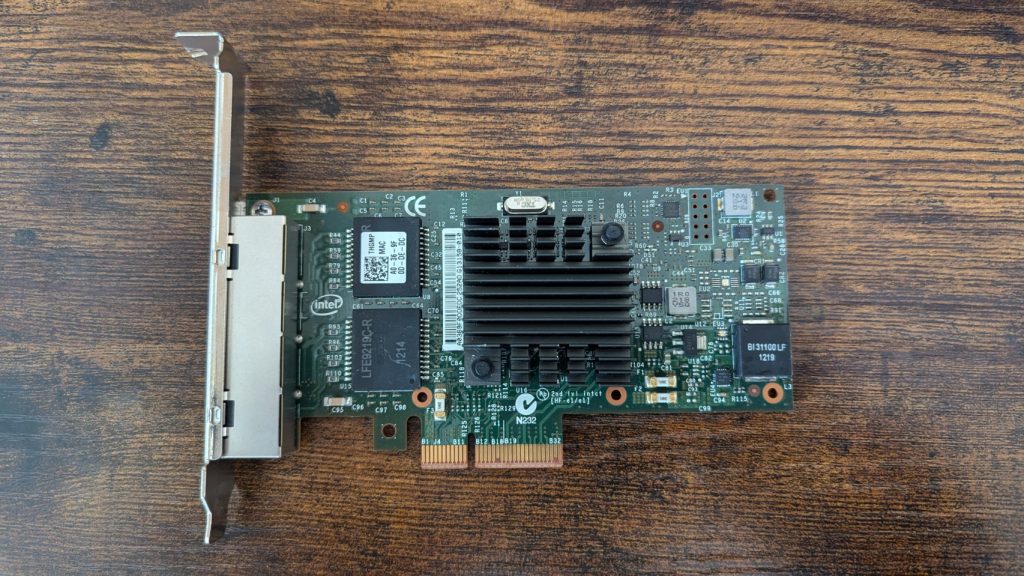
The first component of a custom router project has arrived. I will be pairing it with a Lenovo ThinkCentre M720q Micro PC that’s running pfSense. Can’t wait to start tinkering and learning more about networking with this homemade router.
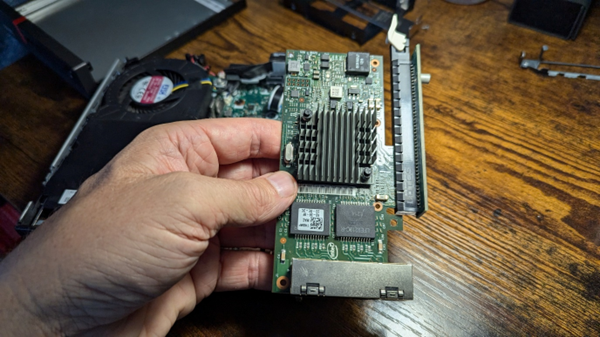
This is an Intel network interface card (NIC), specifically an Intel I350-T4 Gigabit Ethernet adapter. Here are some key points about this hardware:
PCIe network adapter card – designed for server and workstation use.
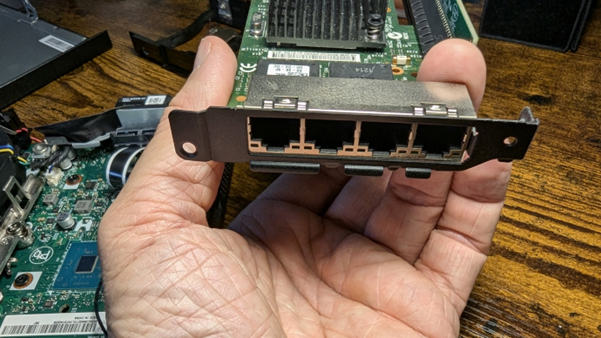
4 Gigabit Ethernet ports – for network connectivity.
Manufactured by Intel – as evidenced by the Intel logo on the circuit board.
Intel I350 Ethernet controller chip
Large black heatsink – to dissipate heat from the main chip.
Full-height PCIe bracket – for installation in standard PC cases
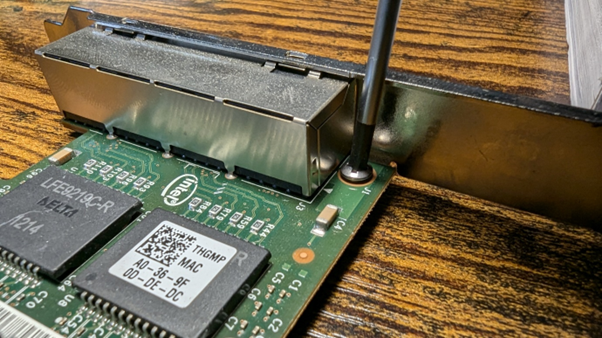
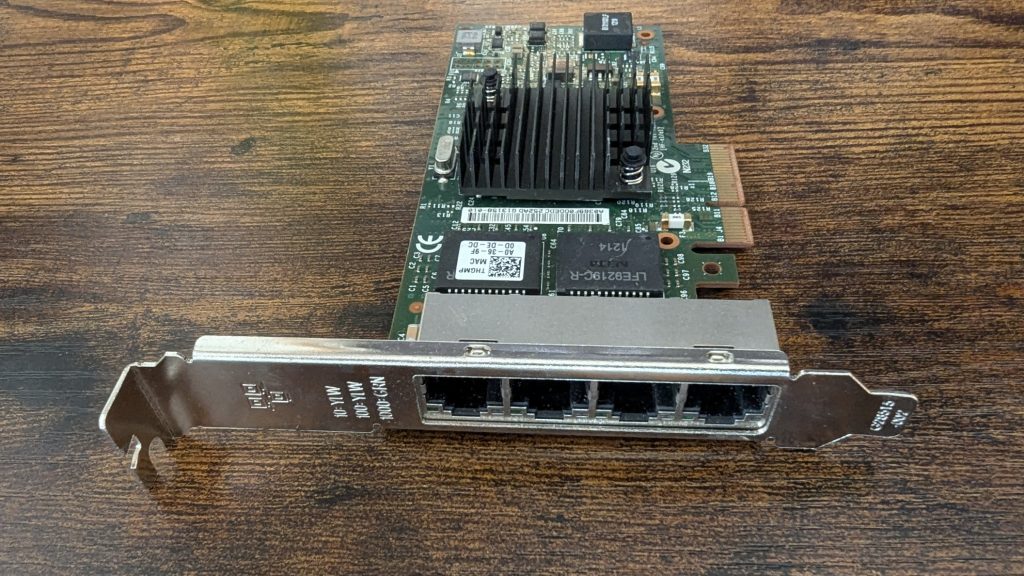
Chips
Apart from the i350 chip itself under the heatsink we have:
LFE9219C-R – It appears to be the main controller chip for the network adapter. Likely an Intel I350 Ethernet controller, based on the card model.
A0-86-9F MAC – This is the smaller chip above the LFE9219C-R. It has a QR code on it. This chip likely contains the MAC (Media Access Control) addresses for the Ethernet ports
Together, they enable the card to process network traffic, manage multiple connections, and integrate with the host system’s PCIe interface. The presence of these specialized chips highlights the advanced capabilities of this Intel network adapter, designed for high-performance networking in professional and enterprise environments.
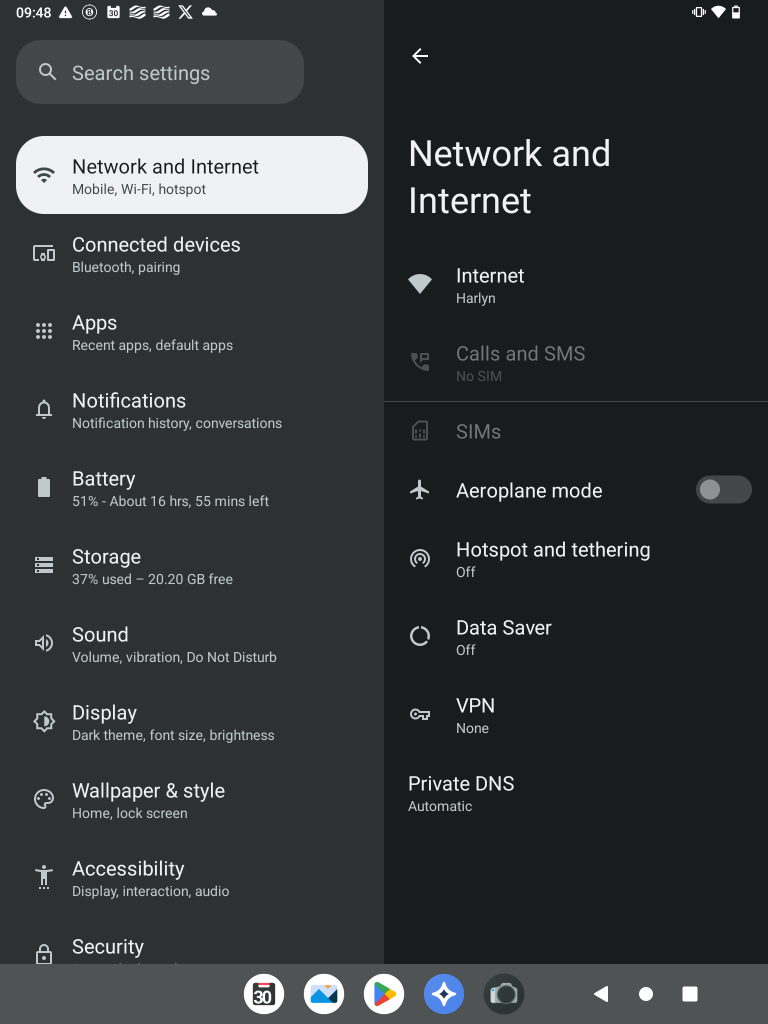
One of the, many, things that bugs me about this world is planned obsolescence. Electronic devices are dropped from support long before the hardware fails or becomes obsolete. My Samsung Galaxy Tab S3 is a prime example of this. It is a nice tablet, OLED screen, decent processor etc but the security updates haven’t been coming since March 2020 and yet it was only released in mid-2017 and they were still selling it in late 2018. So, only two years of full security.
Morals and ethics aside, what can we do about this? I had been thinking of the option of rooting the device and installing a different OS on it for a while, but it is a daunting task full of variables and chances of ruining the device. You can ‘brick’ a device if you get this wrong. As time went on however it became more and more apparent that there was nothing to lose. I dived into the labyrinth of rabbit holes.
Eventually, after quite a bit of trial and error with different versions of this and that I homed in on a reasonable outcome and learnt a whole lot in the process. I ended up with a functioning tablet with an OS called LineageOS and the Google Play Store enabled by GApps. It functions like Android and you can install the apps you want. It doesn’t have any bloatware, nothing from Samsung and performs like a normal tablet.
At this point I would point out that this is not a step-by-step tutorial but is intended to show the basic process that you would go through. This process will also wipe your device completely and if you get it really wrong you can brick your device. Proceed at your own risk.
The basics of steps I took to achieve this:
Enable OEM Unlocking and USB Debugging.
Install USB Drivers for the PC.
Download: Odin, TWRP, LineageOS 19.1, GApps.
Put device into Download mode.
Connect it to the PC via USB cable.
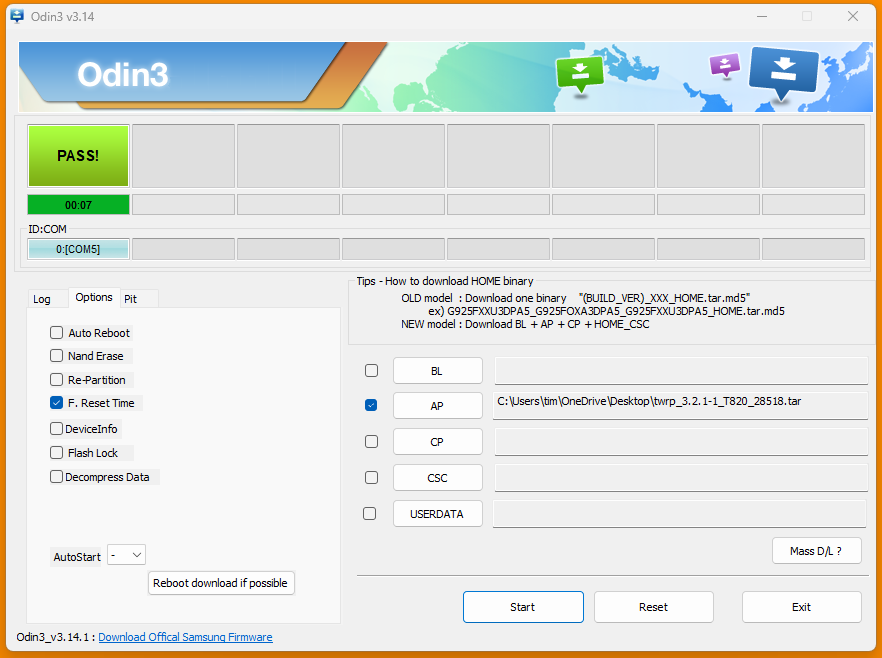
Open the Odin application.
Click on AP and browse to the TWRP tar file.
Deselect Auto Reboot and press Start.
Wait for ‘PASS!’ confirmation that the TWRP has been flashed to the device.
Now put the device into Recovery mode. This is now the TWRP that we just flashed.
In TWRP, first wipe the device.
Then we mount the device to the PC so we can access the storage.
Transfer the LineageOS and GApps to the device.
Flash the LineageOS to the device using Install.
Then once that is done flash the GApps.
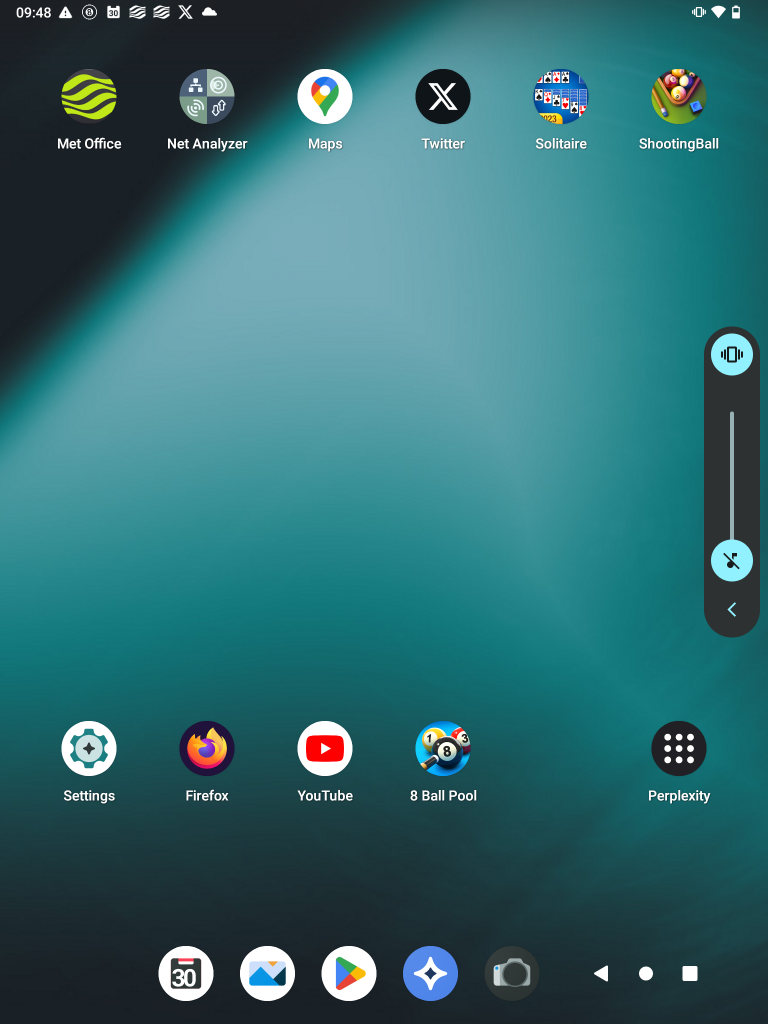
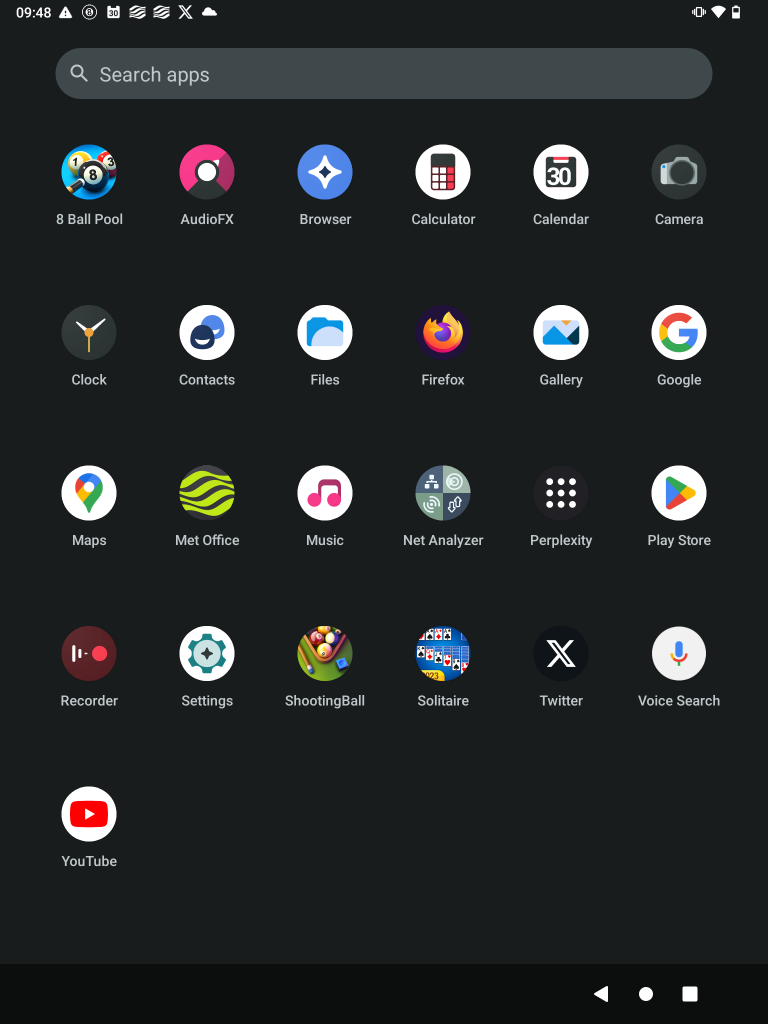
Now we can reboot the system and we will have a clean install of the LineageOS that includes Google Play Store and behaves much like an Android device.
Breaking It Down
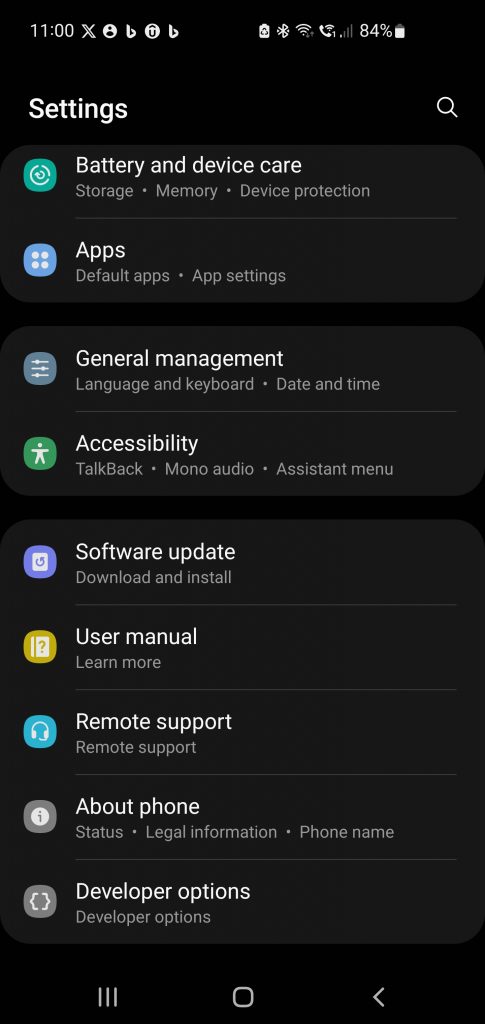
Enable OEM Unlocking and USB Debugging:
In order to flash/install a new recovery software for the device we need to unlock the bootloader, and this is often called OEM Unlocking. To access the device via USB we need to enable USB Debugging. Usually for these options to become available in the settings of the device we need to go into Developer mode which can involve going to About Device > Software Information > and then tap on Build number 7 times. Now Developer Options will be available underneath About Device.
Install USB Drivers for the PC:
This is another step that we need to take to enable our PC to access the device via USB. This is a straightforward procedure. Navigate to the Samsung’s official website and search for the USB drivers for your specific device model. You can also download the Samsung USB drivers directly from many third-party websites, but ensure to choose a reputable one to avoid any potential security issues.
Odin
Odin is a Windows-based software tool developed by Samsung used to flash and install firmware, kernels, and custom recovery images onto Samsung mobile devices. We use it here to install TWRP on the device.
TWRP
TWRP (Team Win Recovery Project) is an open-source, touch-friendly custom recovery software for Android devices that allows users to install third-party firmware and backup their current system with relative ease. We use it to install the LineageOS custom ROM as well as the GApps.
Put Device into Download Mode
This is usually done by a combination of external buttons on the device. On my Tab S3 it is hold Home, Vol Down and then Power button. We put it in this mode so that we can us Odin to install TWRP.
Using Odin to install TWRP
After connecting to the device with USB we then start the Odin application, Select AP (Application Processor. The core system) and browse to the TWRP tar file. It’s important not to reboot now but instead go to the recovery which is now TWRP and not the default recovery installed with Android.
Mount the device
Simple steps in TWRP to mount the device to the PC so we can transfer files to the device.
Flash LineageOS and GApps
LineageOS is the custom ROM that we are installing on the device instead of the official Android firmware. It is based on Android and works in a similar fashion, but it is not developed by large corporations like Google and Samsung but by a smaller but still dedicated group of enthusiasts. GApps is required to install Google elements to the device such as Google Play Store so that we can download and install apps like Maps, Twitter etc.
The Finished Article
Seems simple enough, doesn’t it? Well yes and no. The biggest issue you will have when trying to root your device like this is compatibility. You need to find the most recent version of Odin, TWRP, the right USB drivers, the correct LineageOS version for your device as well as GApps which has multiple sizes, configs and associated Android versions content with.
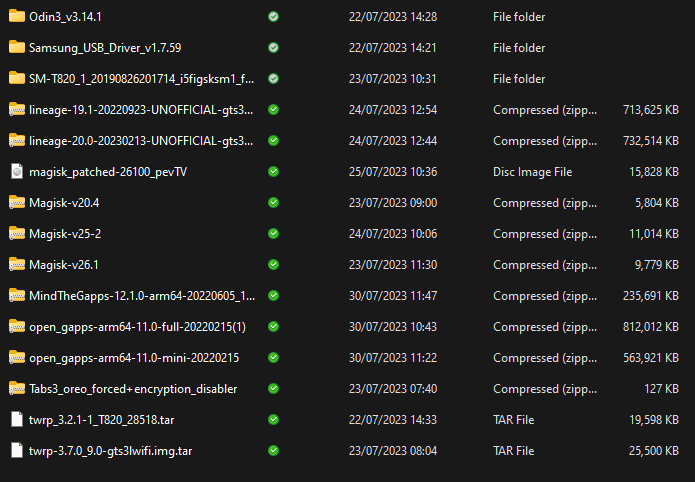
Some of the files I downloaded:
You will notice a zip file called Magisk in there. Magisk is an app that will root your device without performing a clean install so you can gain more control over your up to date Android OS. This is a whole other chapter to rooting and for another day.
Replacing a single failed key on a laptop can be a hassle, especially when you have to take the whole thing apart just to get to the keyboard.
Taking It Apart
I recently had to go through this process myself, and it was not an easy task. From gathering the necessary tools to carefully disassembling the MacBook Pro and replacing the keyboard, it was a time-consuming and meticulous process. The keyboard itself has 51 miniature screws holding it in place. There are very few parts of the laptop that are not removed for this. Fortunately the screen is one of them.
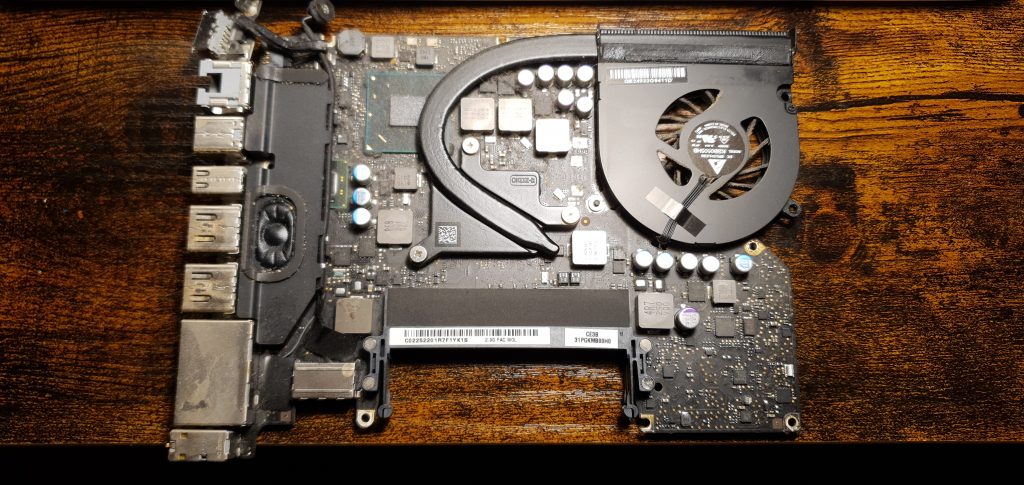
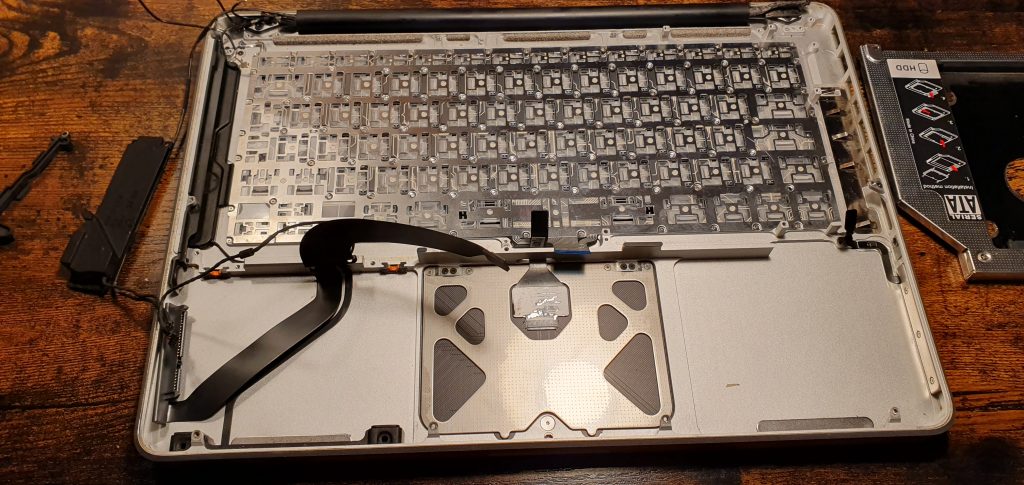
A1278 Logic Board
The logic board was completely disconnected and removed. Obviously a good time for a clean up but I stopped short of going at it with a toothbrush and isopropyl alchohol fearing that I was more likely do more harm than good.
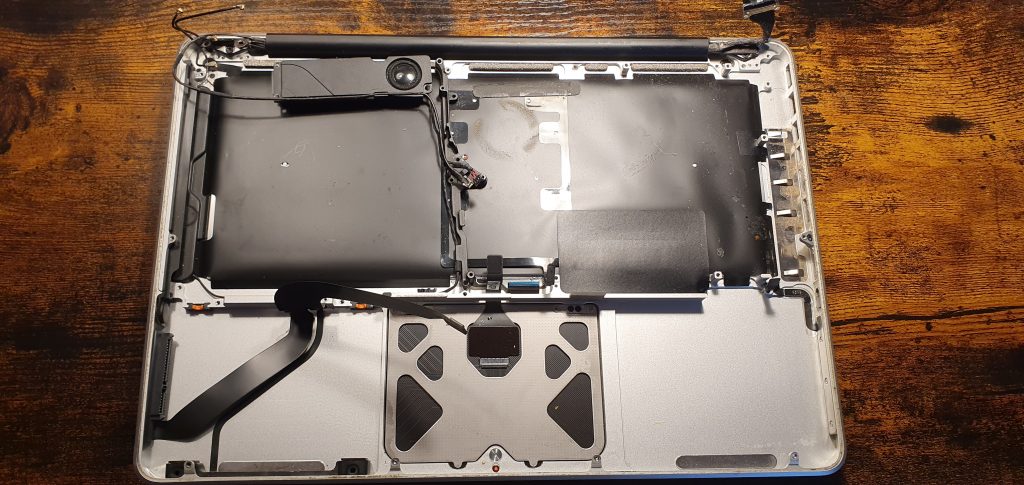
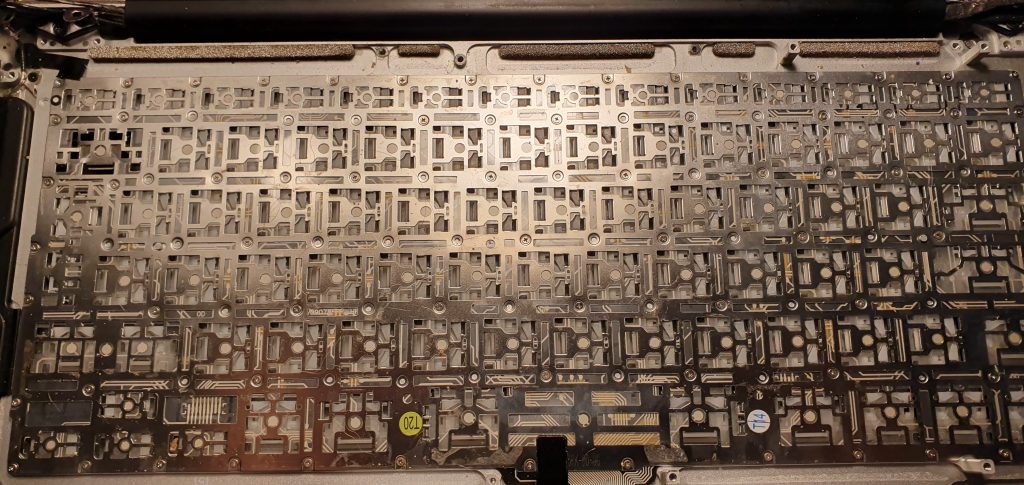
Only the keyboard seal left, however this contains more components
Once everything has been removed and there is only the keyboard seal left you have to carefully remove this without damaging it or the lightboard inside which provides the backlighting for all the keys.
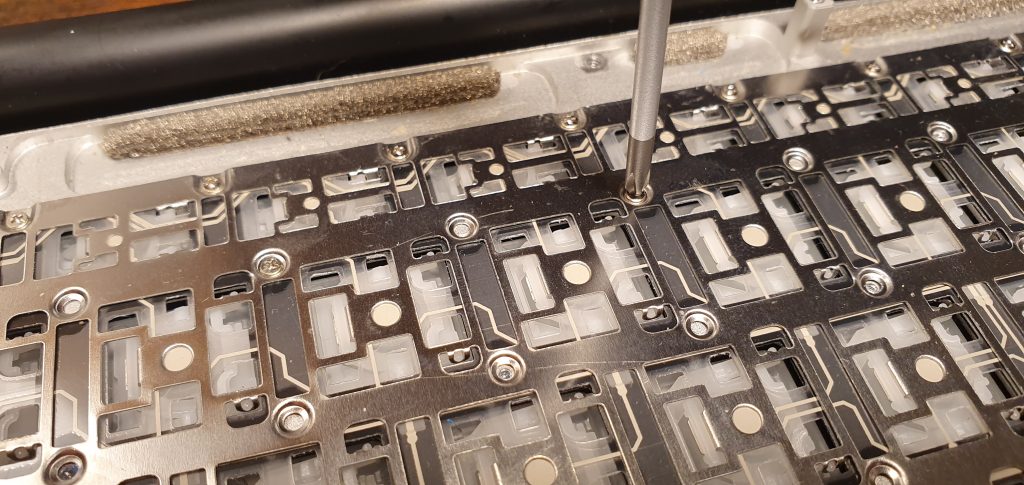
That’s a lot of screws
Finally we reach the keyboard itself and start on the 50+ tiny screws that need to removed and not lose.
Now Put It All Back Together
With the new keyboard in place we now have the task of putting it all back together correctly. Most of it is common sense but it is strongly advised to take as many photos as you can as you disassemble. Knowing which screws go where is the main challenge. They are all fairly similar.
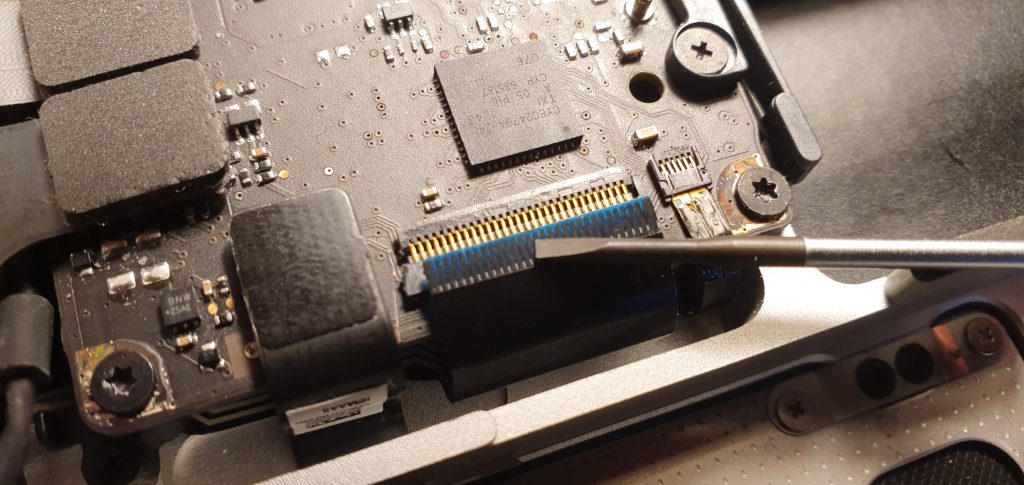
Not easy!
The hardest part of the reassembly was reconnecting the keyboard itself to the logic board. It’s just a thin ribbon of a tab with very little to get hold of to push into the socket. It took many attempts and it’s easy to damage it.
The finished article
But it’s all worth it when the we have a fully functional laptop once again.
To provide the best experiences, we use technologies like cookies to store and/or access device information. Consenting to these technologies will allow us to process data such as browsing behaviour or unique IDs on this site. Not consenting or withdrawing consent, may adversely affect certain features and functions.
Functional
Always active
The technical storage or access is strictly necessary for the legitimate purpose of enabling the use of a specific service explicitly requested by the subscriber or user, or for the sole purpose of carrying out the transmission of a communication over an electronic communications network.
Preferences
The technical storage or access is necessary for the legitimate purpose of storing preferences that are not requested by the subscriber or user.
Statistics
The technical storage or access that is used exclusively for statistical purposes.The technical storage or access that is used exclusively for anonymous statistical purposes. Without a subpoena, voluntary compliance on the part of your Internet Service Provider, or additional records from a third party, information stored or retrieved for this purpose alone cannot usually be used to identify you.
Marketing
The technical storage or access is required to create user profiles to send advertising, or to track the user on a website or across several websites for similar marketing purposes.