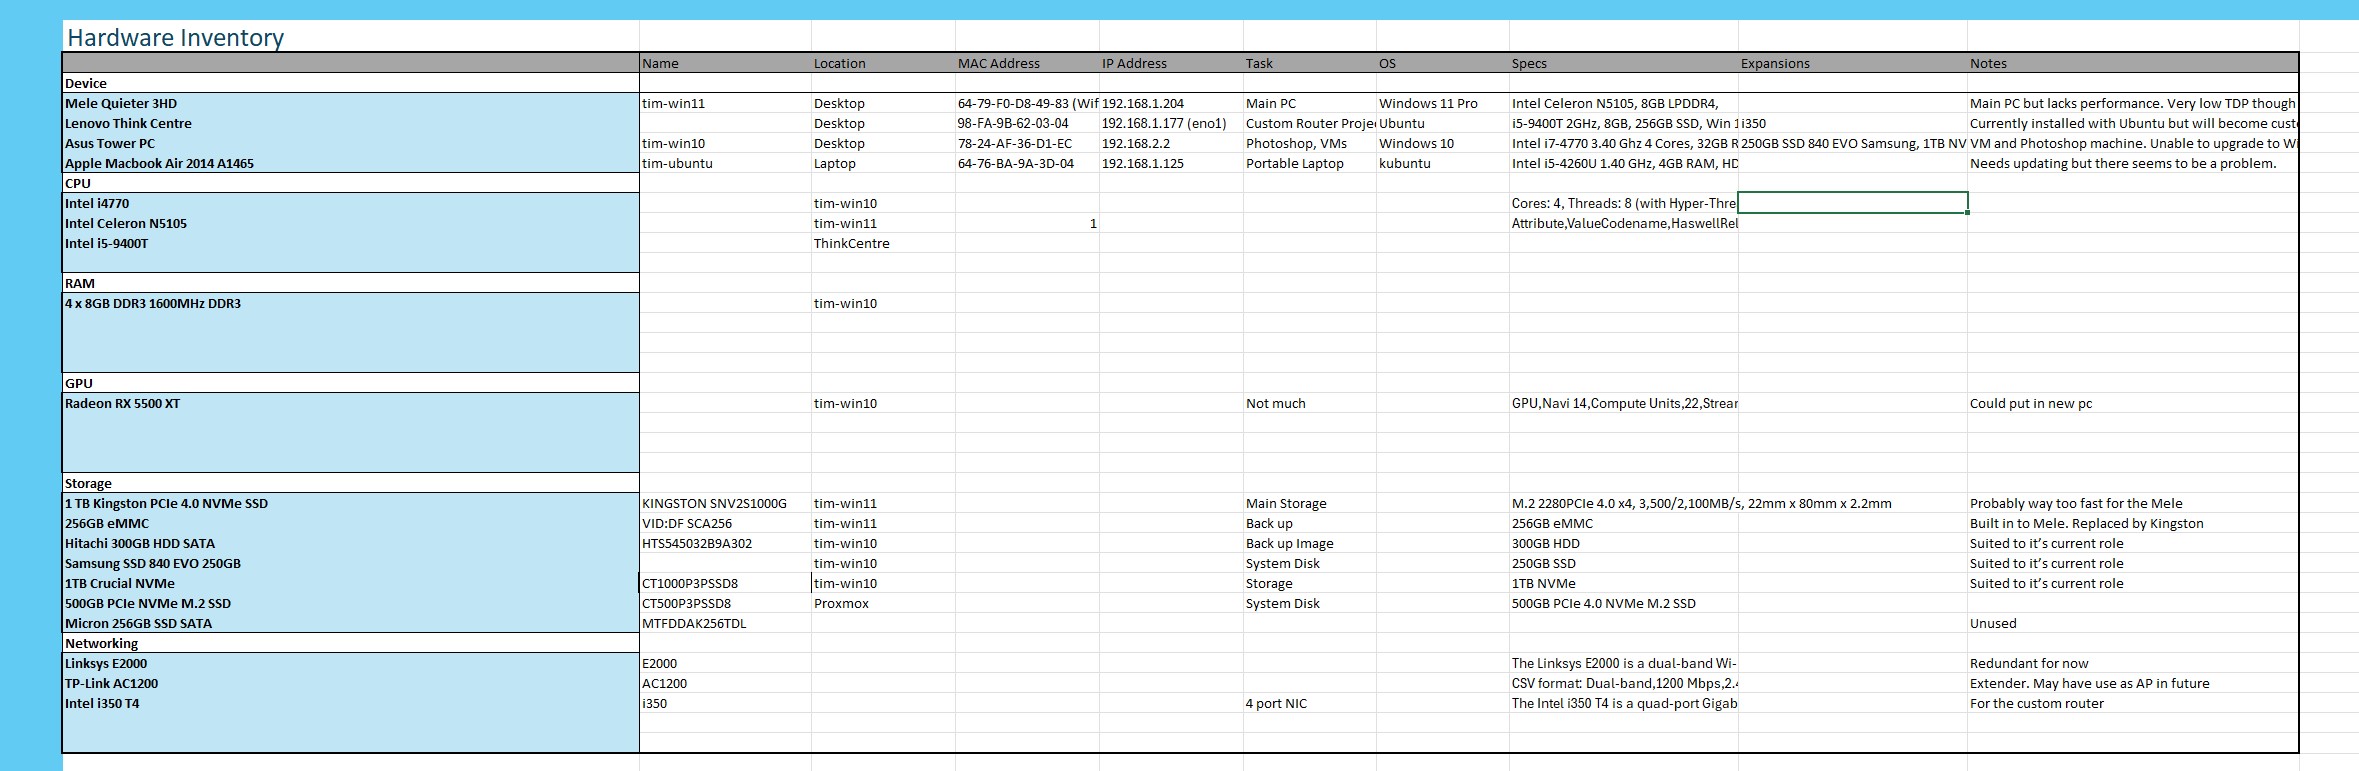
Create a network diagram, with some logical elements, to keep track of all the machines, virtual and physical, their IP addresses and all of the associated hardware.
This is diagram is created with draw.io which is available in the your browser or as a desktop app.
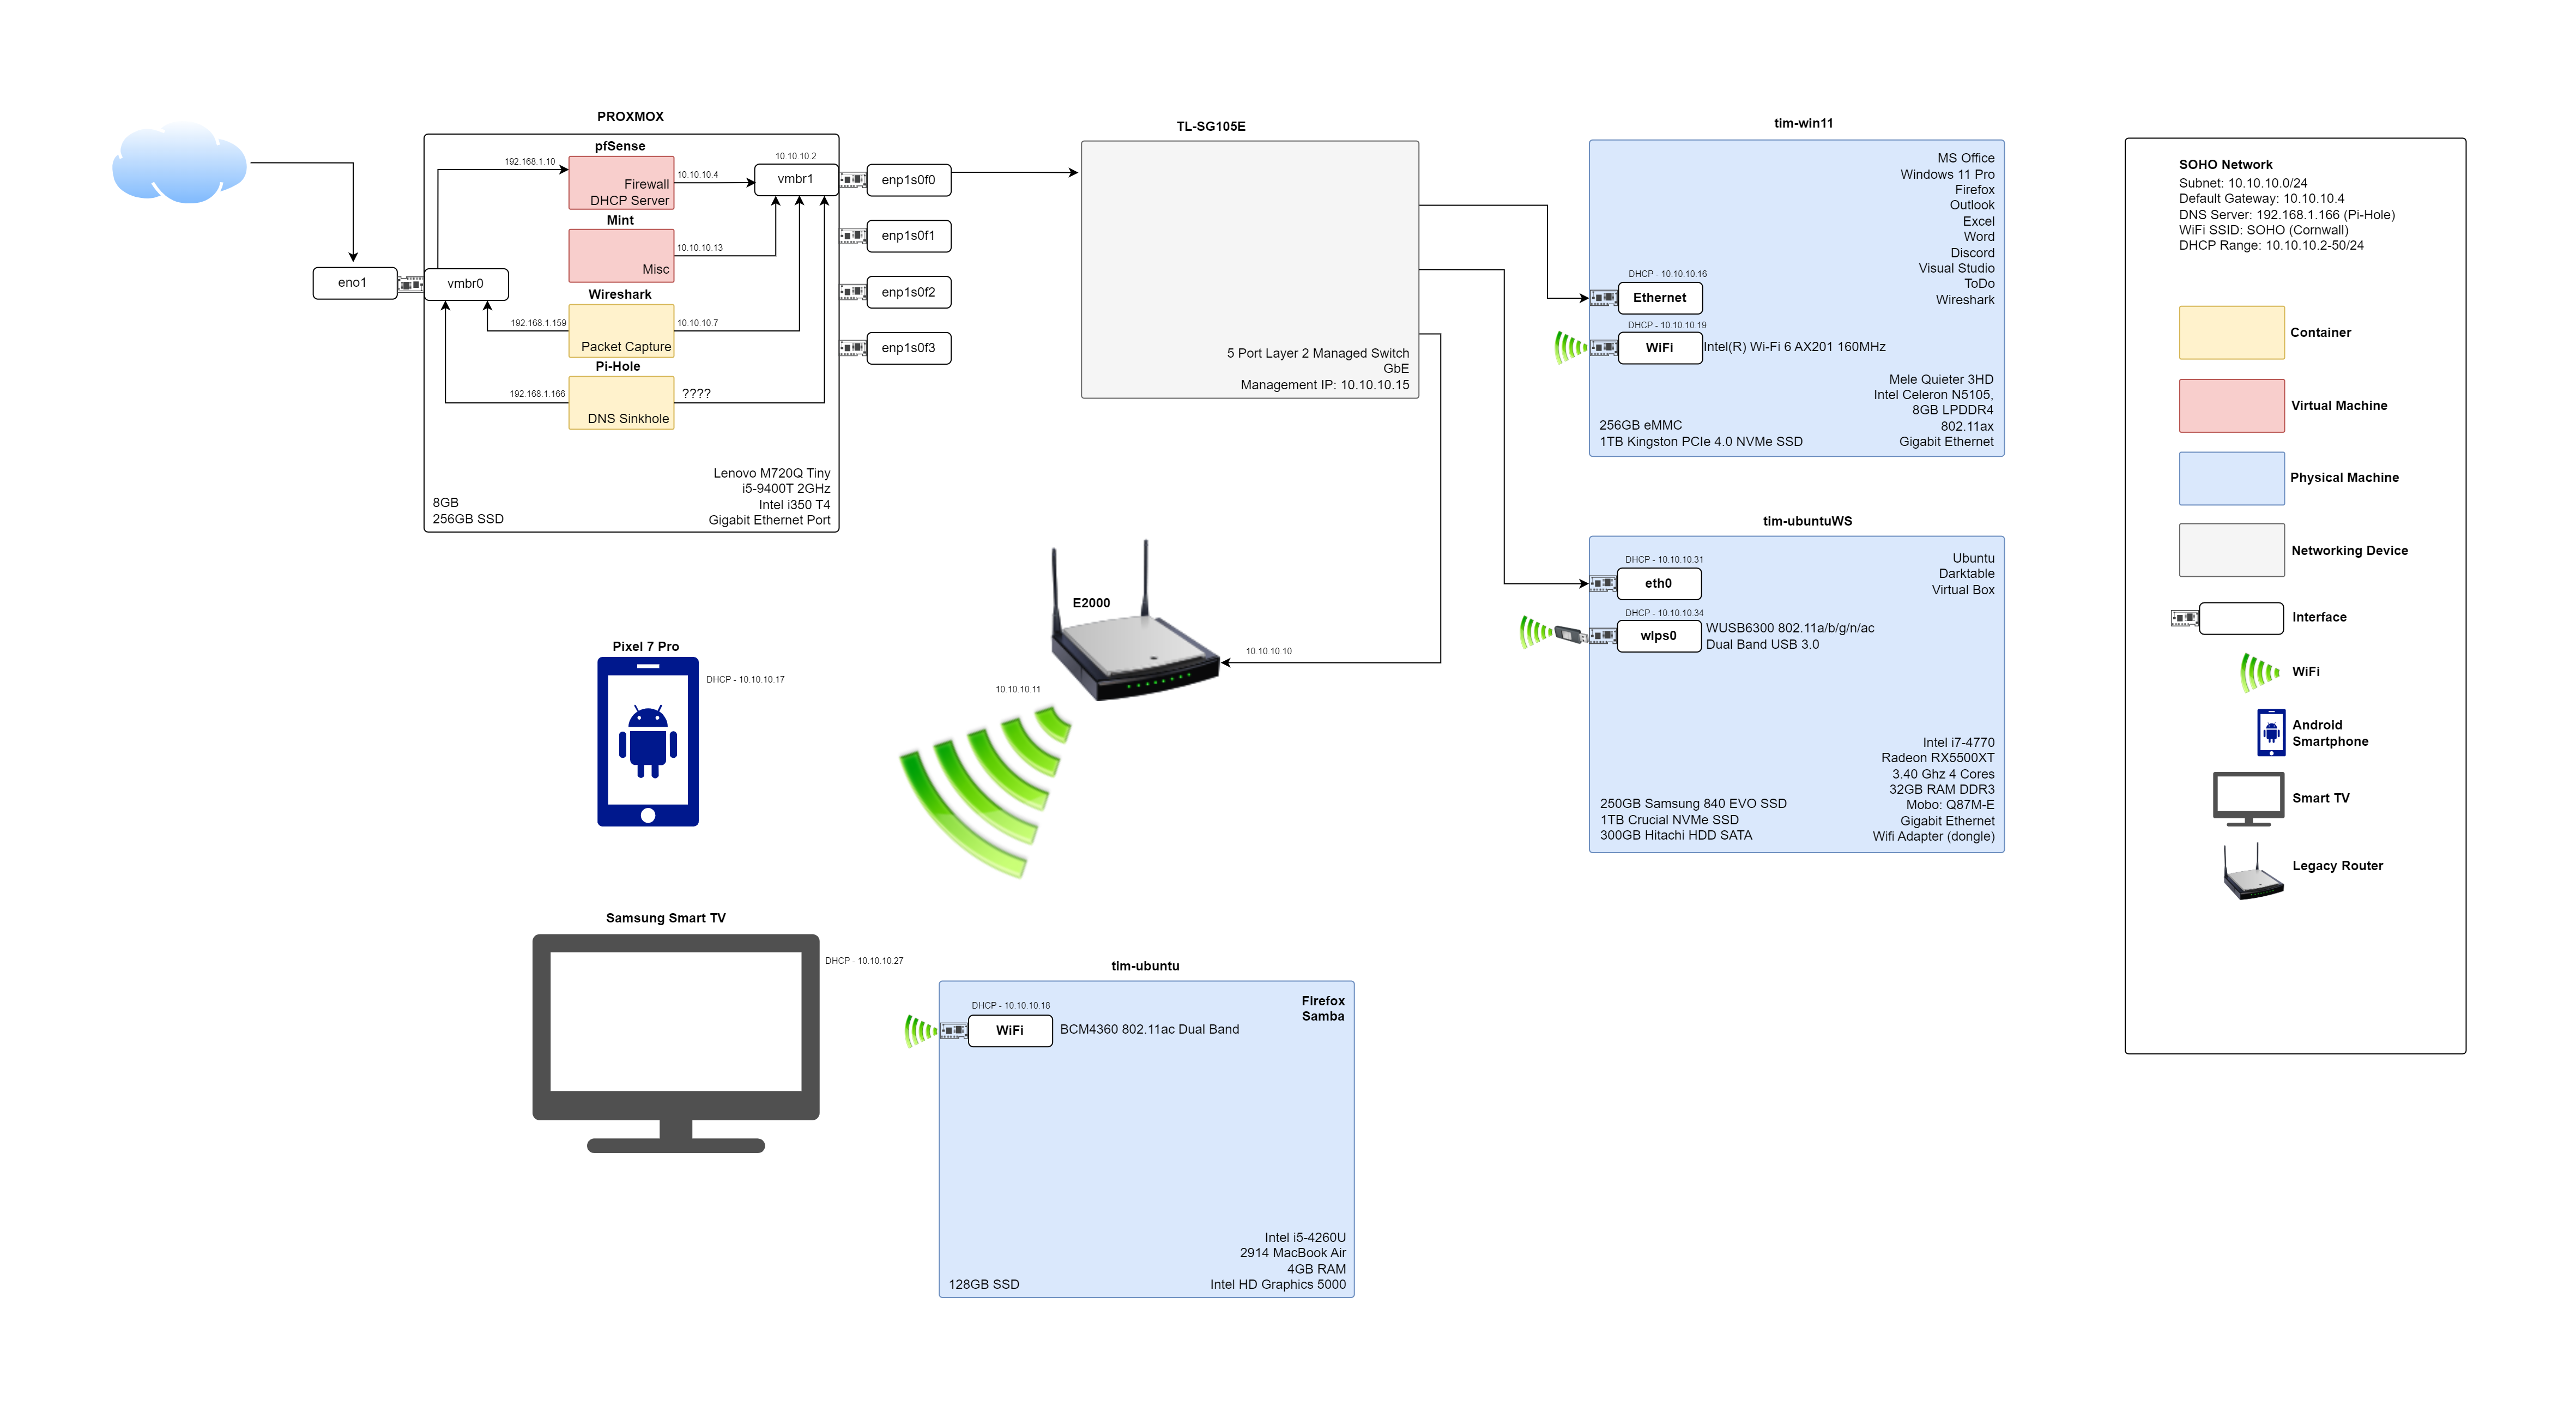
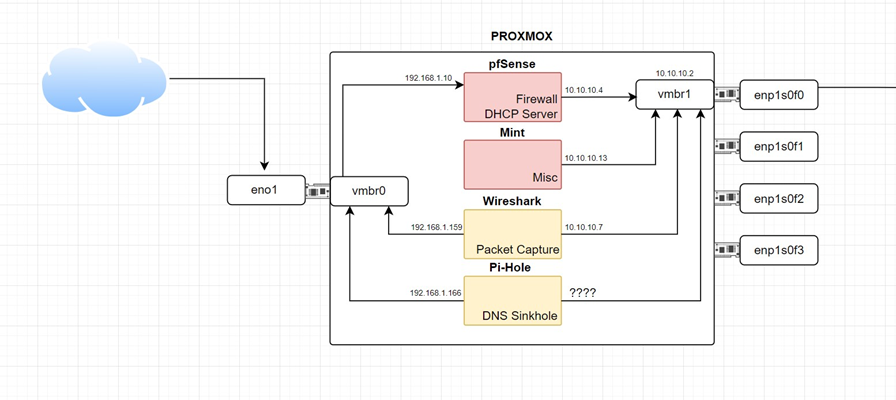
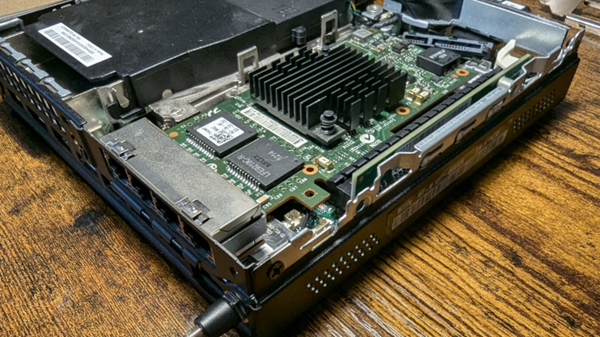
We have Proxmox running on a Lenovo mini-PC. Within this we are running two VMs and two containers. We can see the extra interfaces the i350 provides although we are only using one along with the gigabit port that is native to the PC.
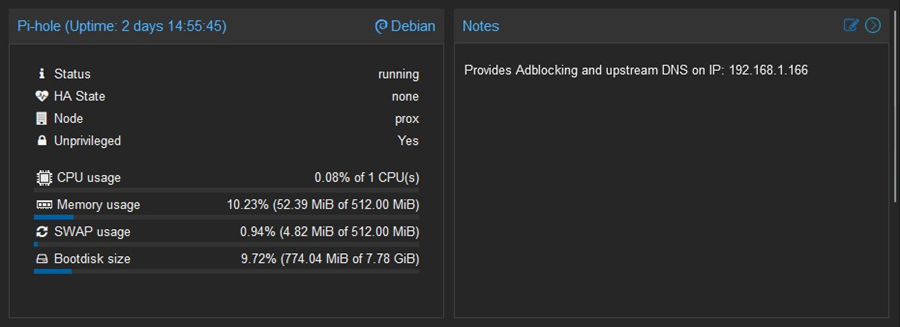
pfSense is the primary application which is providing router, firewall and DHCP services. The Mint VM is for miscallaneous exercises and also to have a look at the distro. The ‘Wireshark’ container is work in progress for a dedicated process of sniffing the network packets and providing a summary in text format at the end of the day. Pi-Hole is primarily for ad-blocking and malicious domain avoidance.
Next in line is the TL-SG105E and the rest of the devices are connected via this managed switch. Then there is tim-win11 which is my daily driver and often acts as the thin-client to tim-ubuntuWS. There is a legacy Cisco router which has been repurposed as an AP. DCHP has been disabled to avoid conflicts with IP addresses.
By most standards this is a small homelab but nonetheless is a great source of hands-on experience.
After spending significant amounts of time on the Custom Router Build it soon became apparent that there was stacks of headroom left in the M720Q Tiny for other things. So how could I run pfSense, the primary reason for the device, along with other processes or applications that would be useful or just plain fun?
Enter Proxmox
Proxmox is a Virtual Environment and open-source platform for virtualisation. With Proxmox we can make VMs and containers for pretty much anything we need. Fundamentally it is a Class 1 Hyper-visor that runs on bare metal. My initial plans were to run pfSense as a VM then DNS sinkhole Pi-Hole as a container. While I am at it why not spin up an instance of Mint Linux and a container purely to run tshark and learn how to automate packet captures?
Piece of Cake
Installing Proxmox itself is as easy as creating a USB version of the ISO and booting from that. Once installed creating VMs and containers is even easier.
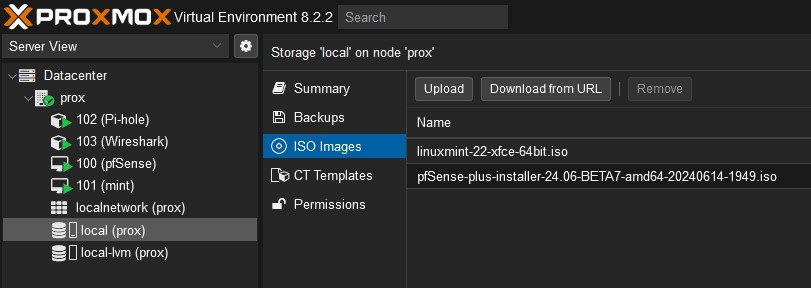
Uploading ISOs is straightforward.
On top of all that the GUI and overall set up of Proxmox is extremely intuitive.
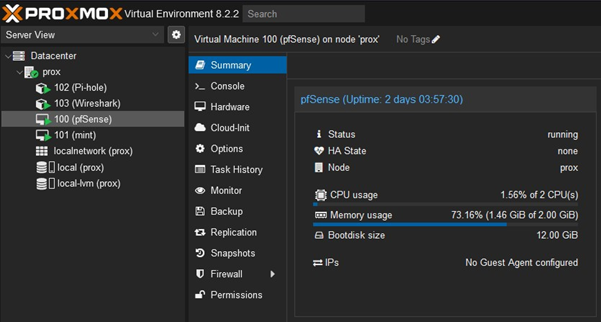
Datacenter will show you the overall server or cluster. Then you have individual nodes – here we have just the one. Inside each node are the VMs and containers.
We can see the Network set up for our ‘Prox’ node. Notice the two virtual bridges that are assigned physical network adapters.
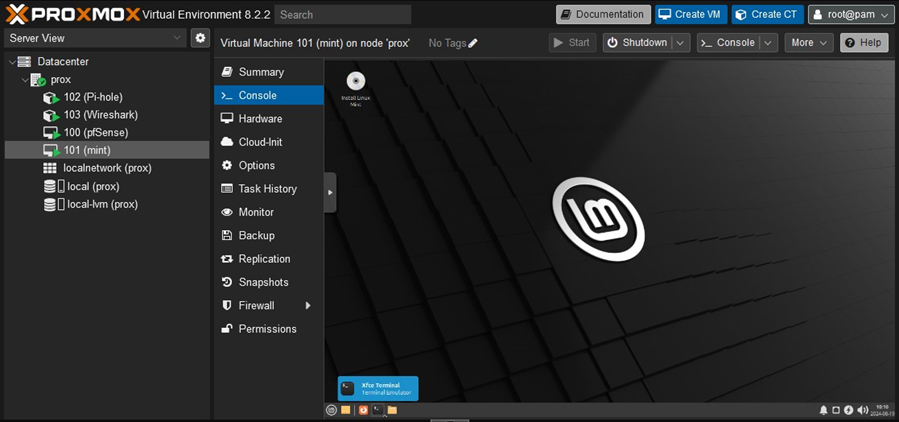
Mint installed as a VM
Pi-hole as a container
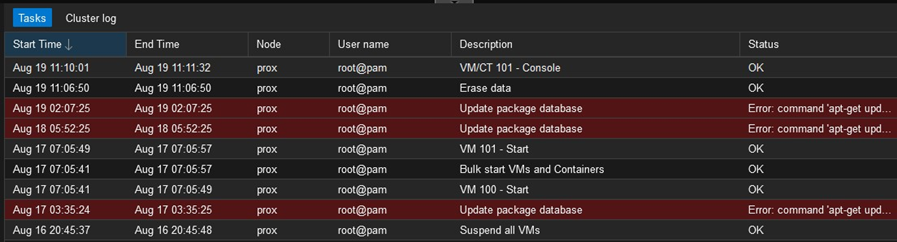
Logs
Making a diagram always helps. This set up is the core of my home SOHO network.
So, by using Proxmox on the M720Q Tiny I have pfSense, Pi-Hole and VM for Mint and a container for packet capture. So far the load on the device is not high at all. May want to get some more RAM soon.
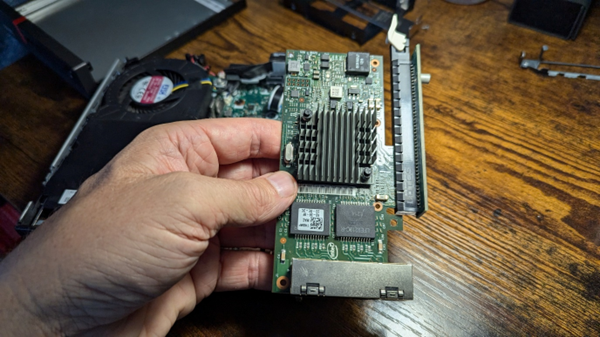
This project aims to identify and assemble components for a custom router that can serve as an alternative to standard commercial routers. By employing pfSense software and installing a quad-port Network Interface Card (NIC) into a Small Form Factor (SFF) PC, such as the Lenovo M720q, we can create a custom router. This router can be used for various purposes, including blocking ad servers, and serves as an excellent tool for learning and gaining hands-on experience in network management.
Considerations
How much compute? – Standard router and firewall do not need that much grunt but maybe we get into IDS/IPS or similar?
Budget – how much do we want to spend on this?
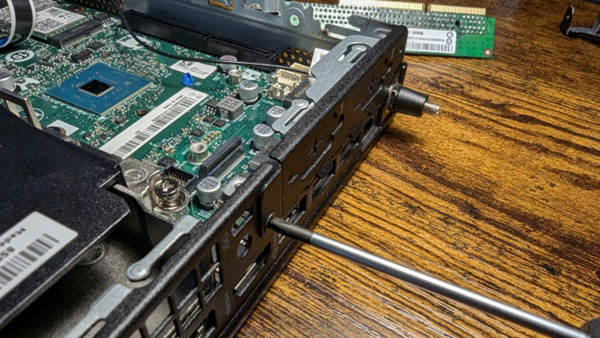
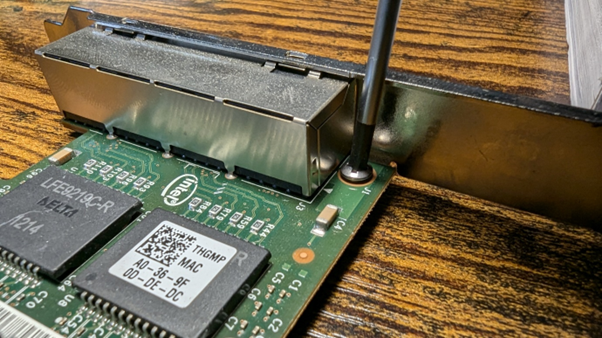
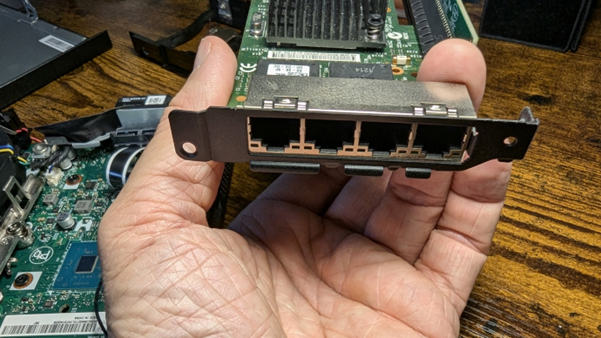
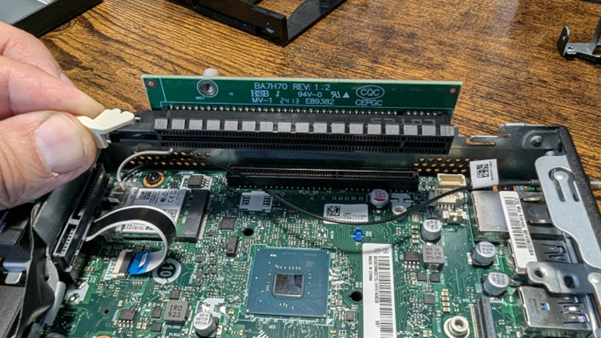
M.2 SSD – the NIC will take up the space for the SATA SSD.
Power usage – what is acceptable? 30W? Comments on the reddit claim 15W or so.
Managed switch – do we want to add this to the set up?
Parts Needed
This set up worked with the parts I chose. It is a tight fit and starting off with a different mini-PC will mean some research on how to make it work.
You will need:
Mini PC with a “PCIe” slot onboard – I chose a Lenovo m720q Tiny.
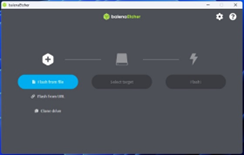
Use a tool like Balena Etcher or Rufus (Linux) to create a USB installer.
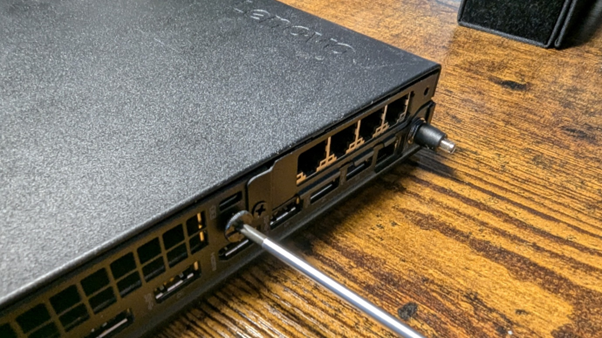
Insert the USB into the m720q.
Insert or have ready the ethernet cables for your WAN and LAN.
Reboot into the BIOS/UEFI or boot menu (Lenovo is F1).
Choose Full Install.
Select Destination Drive.
Choose ZFS.
Choose RAID 0 – no redundancy.
Choose interfaces for WAN and LAN.
At this point you can use AutoDetect and you may need to remove and replace the ethernet cables.
Wait for the installation to complete.
Remove installation media.
Allow the system to reboot.
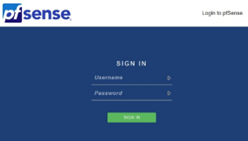
Use a browser to access the webConfigurator.
Default credentials.
admin
pfsense
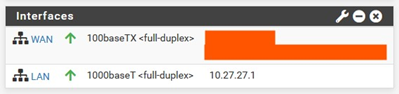
Check that the latest version has been installed.
Check that the interfaces have IP addresses. (My public IP hidden)
Set Up DHCP for the LAN.
Choose a private address range such as 10.40.40.1/24
On the machine that you were using to access the webConfigurator, which is on the LAN side of the pfsense machine, you will need to release and renew the DHCP lease.
ipconfig /release and then ipconfig /renew (windows).
sudodhclient -r and then sudodhclient (linux).
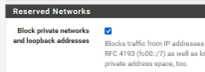
IF you are using this as a device inside your SOHO network and the WAN interface is a private IP address supplied by the DHCP server on the SOHO router then you will need to uncheck the Block private networks and loopback addresses option in the Reserved Networks section of WAN interface configuration page.
Change the default admin credentials for the webConfigurator.
Finishing Up
Now that we have the pfsense up and running we can start playing with it. You can add widgets to the dashboard such as traffic graphs and you can add firewall rules and so much more.
Building your own router with pfSense on a compact PC like the Lenovo m720q is a great way to learn about networking and create a setup that’s just right for you. This project lets you get hands-on with network hardware, tweak software settings, and explore advanced routing features. In the end, you might find that your custom router works better, is more secure, and can do more than off-the-shelf routers.
To provide the best experiences, we use technologies like cookies to store and/or access device information. Consenting to these technologies will allow us to process data such as browsing behaviour or unique IDs on this site. Not consenting or withdrawing consent, may adversely affect certain features and functions.
Functional
Always active
The technical storage or access is strictly necessary for the legitimate purpose of enabling the use of a specific service explicitly requested by the subscriber or user, or for the sole purpose of carrying out the transmission of a communication over an electronic communications network.
Preferences
The technical storage or access is necessary for the legitimate purpose of storing preferences that are not requested by the subscriber or user.
Statistics
The technical storage or access that is used exclusively for statistical purposes.The technical storage or access that is used exclusively for anonymous statistical purposes. Without a subpoena, voluntary compliance on the part of your Internet Service Provider, or additional records from a third party, information stored or retrieved for this purpose alone cannot usually be used to identify you.
Marketing
The technical storage or access is required to create user profiles to send advertising, or to track the user on a website or across several websites for similar marketing purposes.


