
Virtual Machines are all the rage these days and there are many reasons for this. It can be a very cost effective way to run multiple ‘machines’. If you have one powerful server then you can have many VMs running at the same time, all performing different tasks. On top of that it is easy to add and remove them as you require.
VMs are easy to save (snapshot) and restore when things go wrong and also VMs can have enhanced security features such as isolation and secure boot. You can control the resource allocation with clicks of a mouse and you can run pretty much any OS you like, depending on licenses of course.
Hyper-V itself, and other hypervisors, allow for automation and simple management of your VMs with a simple GUI.
Installing a VM on Hyper-V
So let’s say that you want to try out your first VM on Windows, let’s have a look at the steps for that. (This will require administrative permissions). You will need an installer file for the OS you want to install. Linux Distros such as Ubuntu or Kali are free and easy to download.
First of all we need to enable the Hyper-V feature so go to Control Panel > Programs > Turn Windows Features on and off and you will be presented with this dialogue:
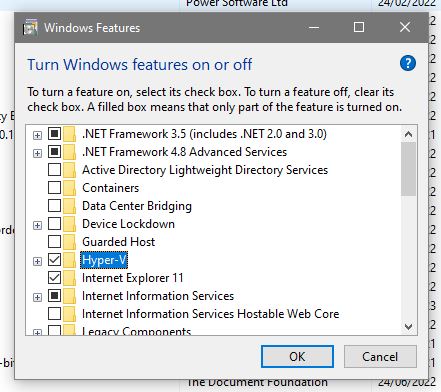
Then you check the box next to Hyper-V and press OK.
Next we can click in the search bar for windows and type in Hyper-V and should see these options:
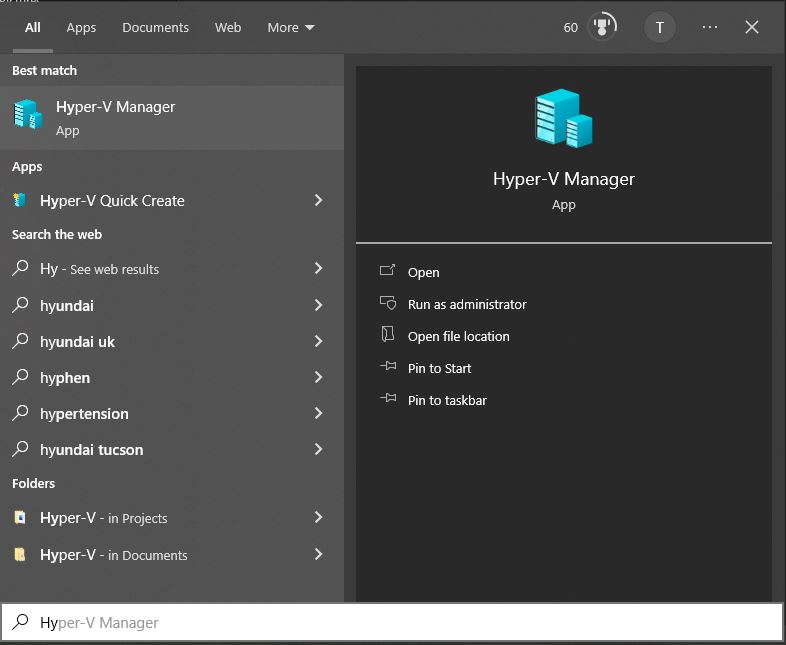
Choose Run as administrator.
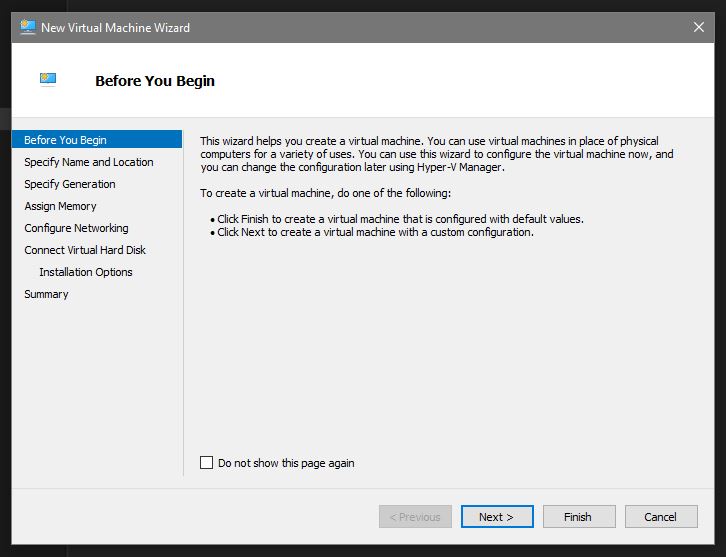
This will open the Hyper-V manager window and we can get started on creating our first VM! Click on New:

This will start the New Virtual Machine Wizard. Click Next:
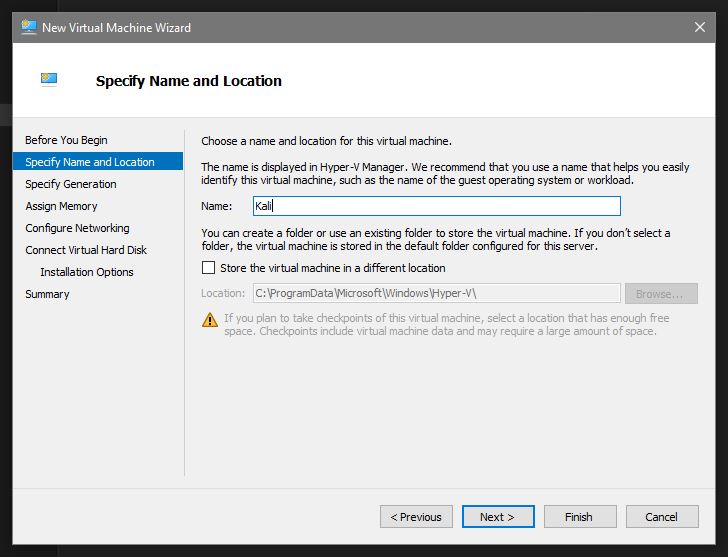
First option to choose is name and location for your VM. Here I am going to create an instance of Kali-Linux so I will call it Kali. When you get into many VMs you will want to have a regular naming convention so it’s best to start thinking about this early on. There is also the option to choose location here but to begin with I would just go with the default:
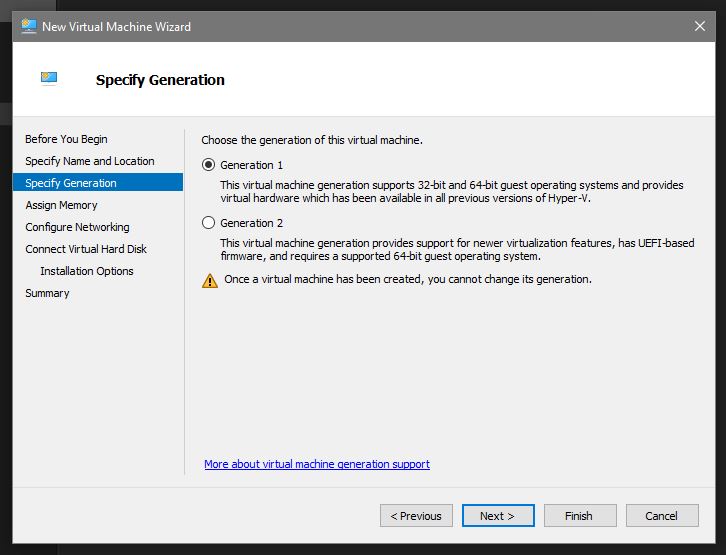
Generation. Generally speaking Generation 1 is BIOS and Generation 2 is UEFI. Unless you are using legacy OS versions go with Generation 2:
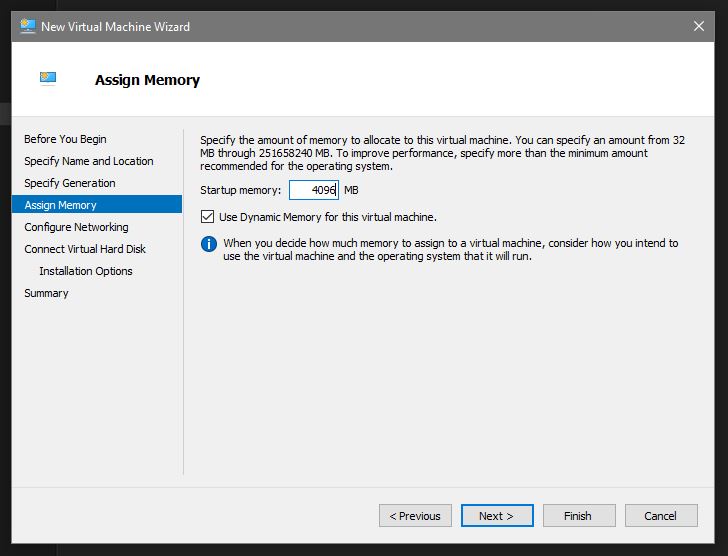
Assign memory. Depending on your host machine, VM OS and number of VMs you want to try and use at the same time you can set the allocated memory for the VM we are installing right now. You want to give a VM at least 4GB if you can. This is why VM workstations have 32 or 64 GB of RAM:
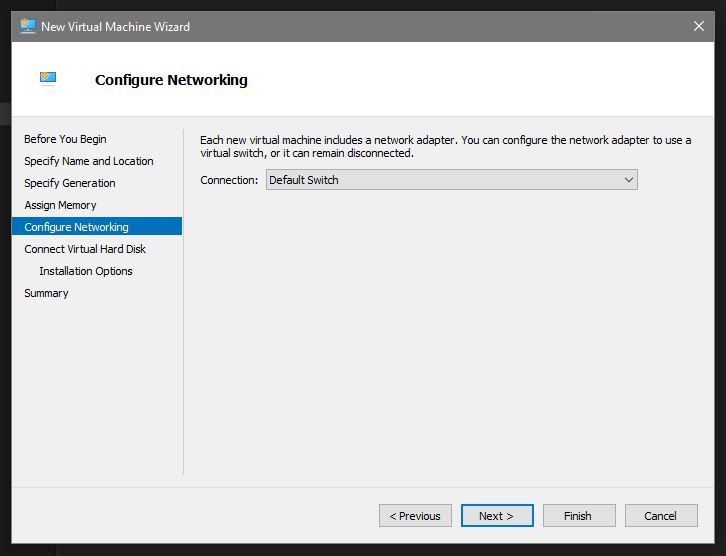
Configure Networking. Do you want your VM to talk with the network? Or just keep it isolated? Choose Default Switch for the former:
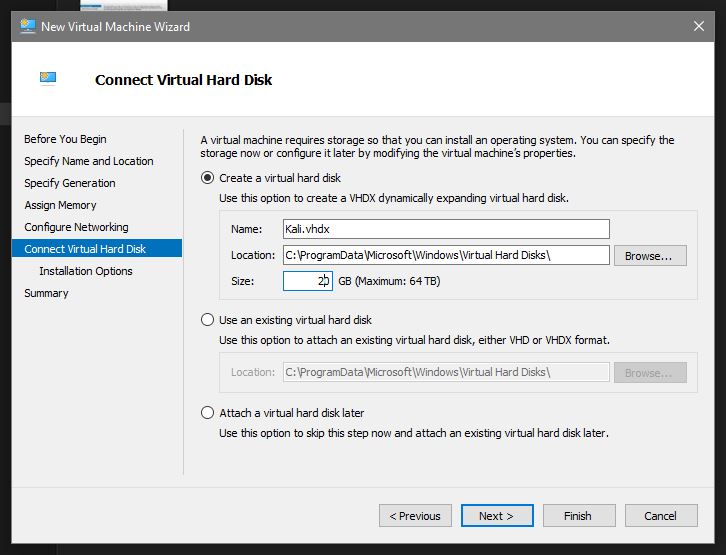
Similarly to the RAM allocation we now want to Create a VHD. Choose default location for now and decide the size you want to allocate:
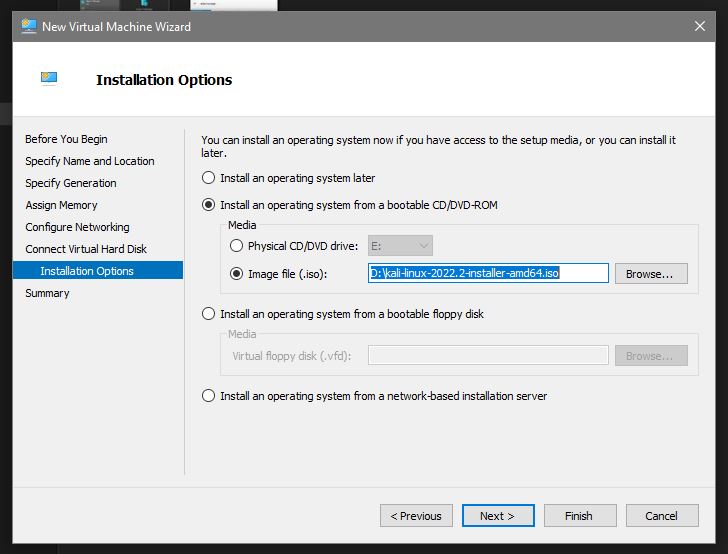
Installation options. Choose how you want to install the OS. Usually best to point it at the ISO you have downloaded:
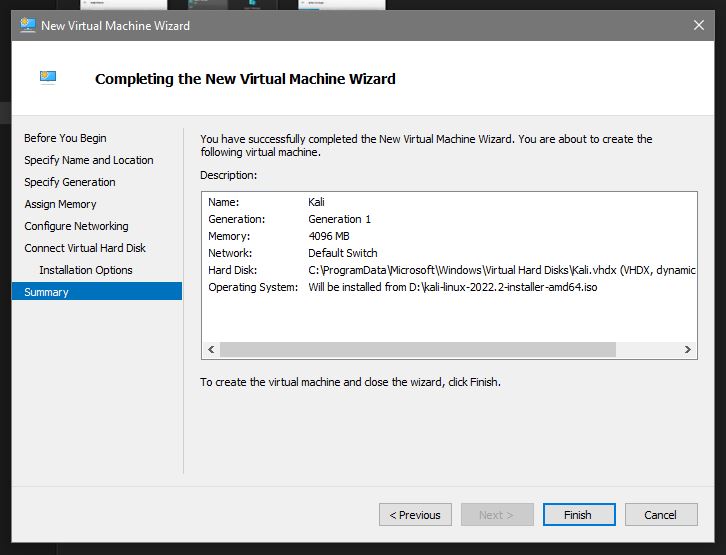
With all that done you can check the config you have asked for and click Finish:
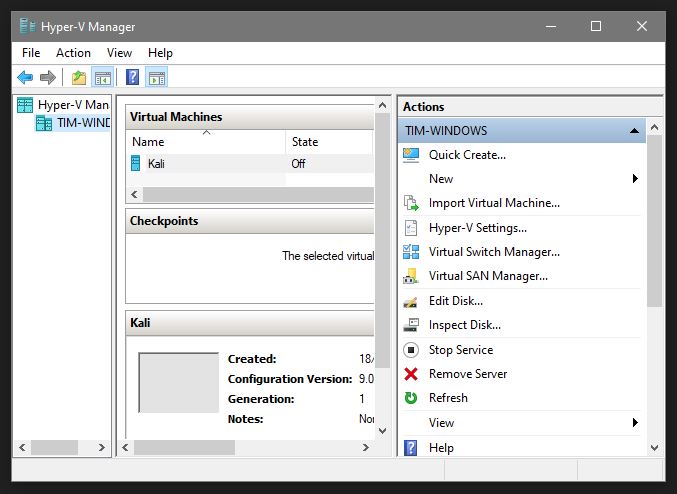
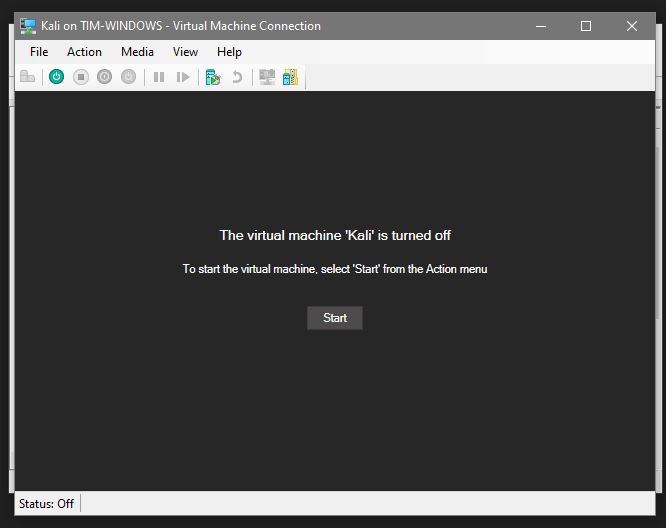
Now we are back at the Hyper-V Manager windows and our Kali VM is present. Click on it and in the lower right hand section click on Start and then Connect:
All being well the machine will start and you will then go through the process of installing the OS as normal:
Using Hyper-V To Your Advantage
Once you have installed a virtual machine on Hyper-V and it is running well, there are several useful features that Hyper-V provides to manage and maintain the virtual machine:
Snapshots: Hyper-V allows you to take snapshots of the virtual machine’s state, including the operating system and all data and applications. Snapshots can be used to revert the virtual machine to a previous state in the event of a problem or to test changes before making them permanent.
Live Migration: With Live Migration, you can move a running virtual machine from one physical host to another without any downtime. This can be useful for maintenance tasks, such as hardware upgrades or repairs, or to load balance virtual machines across multiple hosts.
High Availability: Hyper-V provides High Availability features, such as failover clustering, to ensure that virtual machines are always available, even in the event of a host failure. This helps to minimise downtime and ensures business continuity.
Resource allocation: Hyper-V allows you to allocate resources, such as CPU, memory, and storage, to virtual machines as needed. You can also use resource controls, such as resource metering and resource allocation policies, to ensure that virtual machines have the resources they need to run effectively.
Network virtualisation: Hyper-V provides network virtualization features, such as virtual switches, that allow you to create virtual networks that are isolated from the host and from each other. This helps to secure virtual machines and to control network traffic.
Remote management: Hyper-V allows you to manage virtual machines remotely, using the Hyper-V Manager or Windows PowerShell. This makes it easier to manage virtual machines from a centralized location and to automate management tasks.
Backup and recovery: Hyper-V provides backup and recovery features, such as checkpoint-based backups and replication, to help protect virtual machines and ensure that they can be recovered in the event of a disaster.
These are just some of the useful features that Hyper-V provides for virtual machines once they are installed and running. By leveraging these features, you can manage and maintain virtual machines more effectively and ensure that they are always available and running optimally.