In a global outage that is about as big as they come CrowdStrike made an update that has incapacitated Windows systems around the world. Individually the fix is not so taxing but in an enterprise with 1000s of endpoints down and a handful of IT workers to fix them it’s a mammoth task.
The Fix
Boot Windows into Safe Mode or the Windows Recovery Environment.
Restart and press F8 repeatedly (May be F4 or F5).
Navigate to the C:\Windows\System32\drivers\CrowdStrike directory.
Similar to normal Windows file exploring.
Locate the file matching “C-00000291*.sys” and delete it.
Make sure you find the right one.
Reboot the host normally.
Why that file?
Deleting that specific CrowdStrike driver file likely fixes the BSOD because:
The file may be corrupted or incompatible with the current system configuration.
It could be conflicting with other drivers or system components.
Removing it allows Windows to use a default or fallback driver instead.
The BSOD was potentially caused by an issue within that particular CrowdStrike driver file.
Solution for Automating This?
I came across a post on the r/CrowdStrike thread for this problem. It claims to have an automated solution to this problem for enterprise environments.
Create a modified WinPE image
Add command to startnet.cmd in WinPE image:
del C:\Windows\System32\drivers\CrowdStrike\C-00000291*.sys
Normal boot process resumes without CrowdStrike issue.
WinPE
A modified WinPE (Windows Preinstallation Environment) image is a customized version of Microsoft’s lightweight operating system used for deployment, recovery, and troubleshooting. It’s tailored to include specific drivers, tools, or scripts to meet particular needs. Modified WinPE images are often used by IT professionals for tasks like system deployment or data recovery.
PXE Server
A PXE (Preboot Execution Environment) server allows network-based booting and installation of operating systems on client computers. It provides boot images and configuration files over the network, enabling diskless workstations or computers without local boot media to start up and install an OS remotely. PXE servers are commonly used in large-scale deployments and network management.
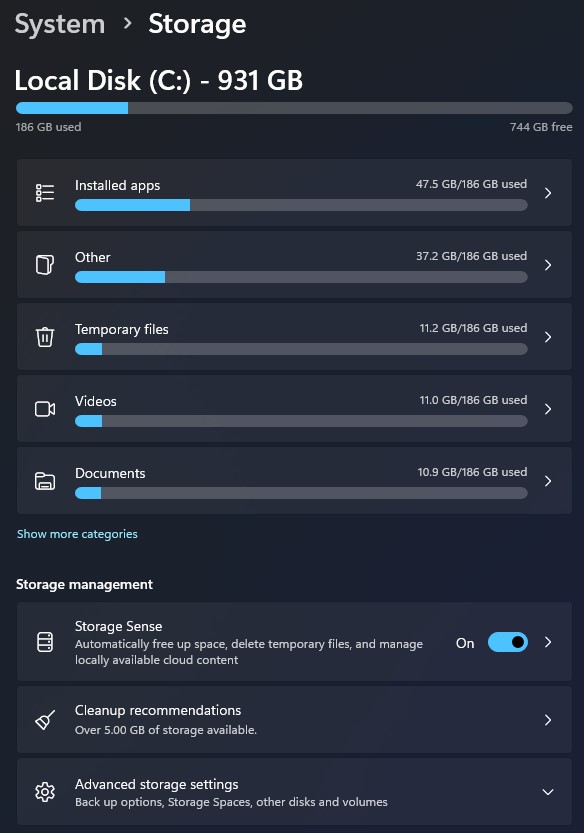
Storage Sense is a built-in Windows feature that automatically manages disk space. It removes temporary files, empties the Recycle Bin, and deletes files from the Downloads folder. Users can customize the cleanup frequency and select specific files for removal. This feature maintains system performance by preventing low disk space issues and is available in Windows 10 and 11.
In the era of modern computing, while hard drive capacities continue to increase, so does our demand for storage space. Regardless of the storage capacity we acquire, we invariably find ourselves filling it, particularly with video content. Storage limitations can impede system performance. Storage Sense is an efficient disk space optimization solution which offers an intuitive method for determining which files to remove. Storage Sense can be configured to operate at specified intervals, such as daily or weekly.
Key Features of Storage Sense
Automatic cleanup of temporary files
Automatically scans for temporary files.
Identifies unnecessary or outdated files.
Removes these files to free up disk space.
Focuses on temp folders, Recycle Bin, and Downloads.
Can be scheduled or run manually.
Helps maintain system performance and storage efficiency.
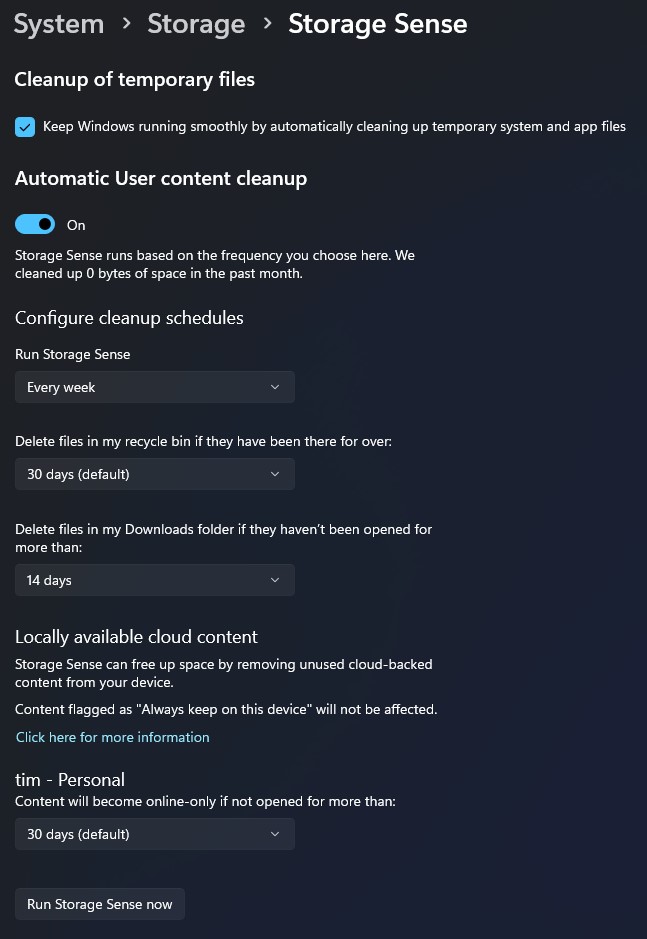
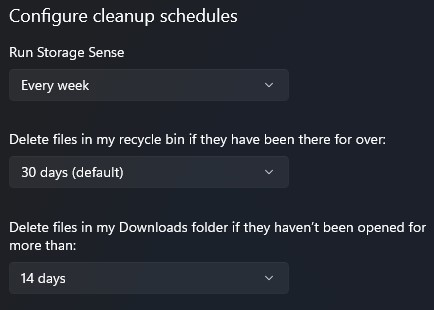
Frequency options for automatic cleanup
Run during low free disk space.
Run every day/week/month.
Run during Windows Update.
Run now (manual trigger).
Management of the Recycle Bin
Automatically deleting files that have been in the Recycle Bin for set period.
Allowing users to customize the period before deletion.
Freeing up disk space by removing unnecessary files.
Providing options to exclude certain file types from automatic deletion.
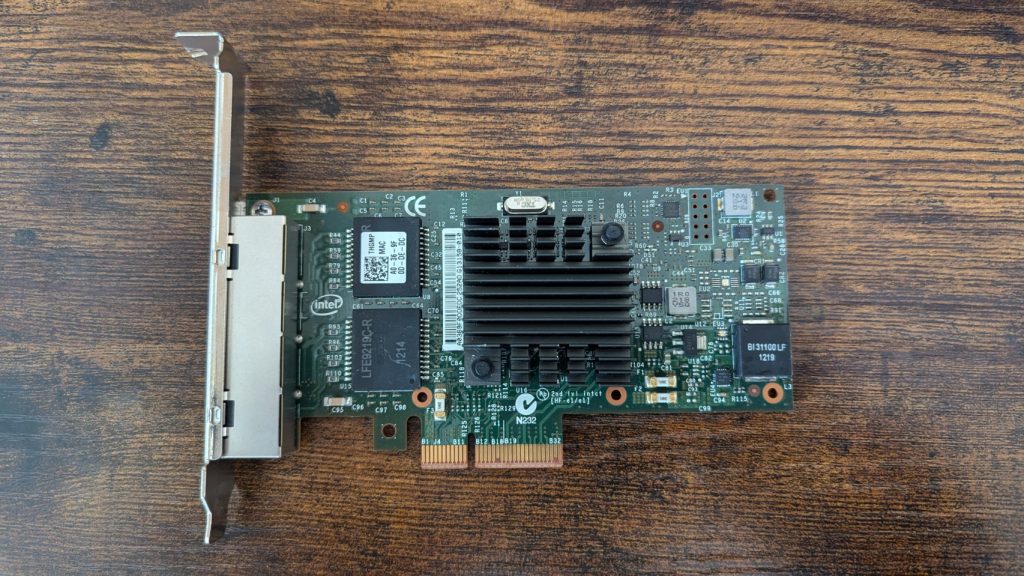
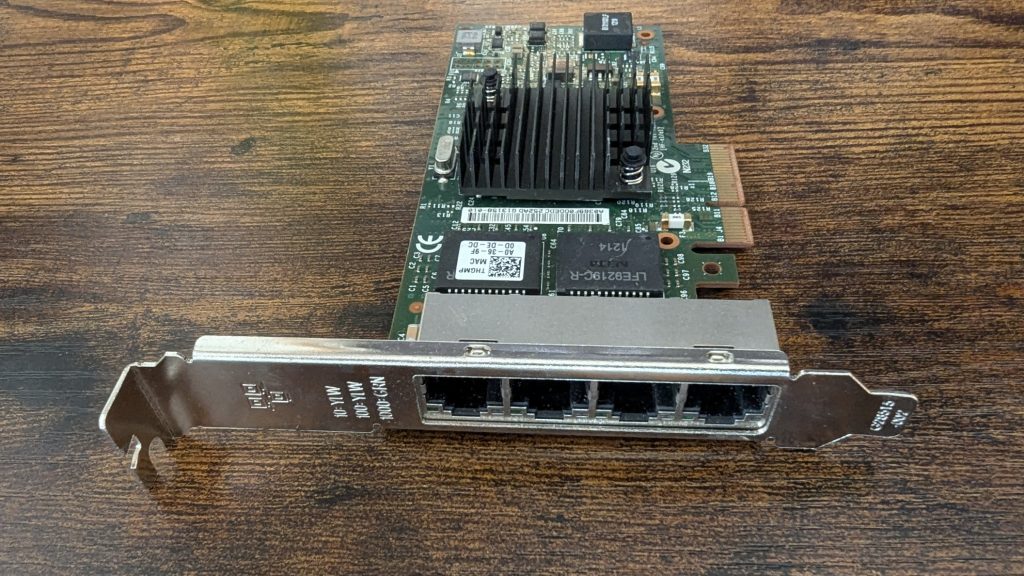
The first component of a custom router project has arrived. I will be pairing it with a Lenovo ThinkCentre M720q Micro PC that’s running pfSense. Can’t wait to start tinkering and learning more about networking with this homemade router.
This is an Intel network interface card (NIC), specifically an Intel I350-T4 Gigabit Ethernet adapter. Here are some key points about this hardware:
PCIe network adapter card – designed for server and workstation use.
4 Gigabit Ethernet ports – for network connectivity.
Manufactured by Intel – as evidenced by the Intel logo on the circuit board.
Intel I350 Ethernet controller chip
Large black heatsink – to dissipate heat from the main chip.
Full-height PCIe bracket – for installation in standard PC cases
Chips
Apart from the i350 chip itself under the heatsink we have:
LFE9219C-R – It appears to be the main controller chip for the network adapter. Likely an Intel I350 Ethernet controller, based on the card model.
A0-86-9F MAC – This is the smaller chip above the LFE9219C-R. It has a QR code on it. This chip likely contains the MAC (Media Access Control) addresses for the Ethernet ports
Together, they enable the card to process network traffic, manage multiple connections, and integrate with the host system’s PCIe interface. The presence of these specialized chips highlights the advanced capabilities of this Intel network adapter, designed for high-performance networking in professional and enterprise environments.
Hping3 is a powerful command-line tool used for crafting and sending custom network packets. It goes beyond the basic ping function by allowing you to send various types of packets, including TCP, UDP, and ICMP. This versatility makes it a valuable asset for network administrators and security professionals.
Uses and syntax
Firewall Testing: By sending different types of packets to network hosts, you can test firewall rules and intrusion detection systems.
Test how a firewall responds to ICMP packets:
hping3 -1 target_ip
-1 sets ICMP mode
Test firewall against TCP SYN packets:
hping3 -S target_ip -p port_number
-S sets SYN mode
Network Performance Testing: HPING-3 can generate traffic to test network throughput, latency, and packet loss.
Send packets at a specific rate (e.g., 10 packets per second) to test throughput:
hping3 --flood --rate 10 target_ip
Port Scanning: It can scan ports on a network to identify open or closed ports, useful for network mapping.
TCP SYN scan on a specific port:
hping3 -S target_ip -p port_number
Scan a range of ports:
hping3 -S target_ip -p 80-100
Traceroute: With HPING-3, you can perform advanced traceroutes, which can help identify the path packets take through a network.
Perform traceroute using ICMP:
hping3 --traceroute -1 target_ip
Perform traceroute with TCP SYN packets:
hping3 --traceroute -S target_ip -p port_number
Denial of Service (DoS) Simulation: It can simulate DoS attacks on a network by generating a high volume of traffic to test the network’s resilience.
Send a flood of TCP SYN packets to simulate a SYN flood attack:
hping3 --flood -S target_ip -p port_number
Crafting Custom Packets: HPING-3 allows for the customization of packet headers, making it useful for testing how different network devices or protocols respond to various packets.
Send a packet with a specific TCP flag (e.g., RST):
hping3 -R target_ip -p port_number
-R sets RST flag
Network Services Testing: By sending packets with specific flags or payloads, you can test how network services respond, which can be useful for debugging or security assessments.
Test how a web server responds to ACK packets:
hping3 -A target_ip -p 80
-A sets ACK
Send fragmented packets to test handling of such packets:
hping3 -f target_ip
-f sets Frag
Without wanting to sound like an LLM, hping3 is a powerful tool that can get you in trouble if you point it at the wrong IP address.
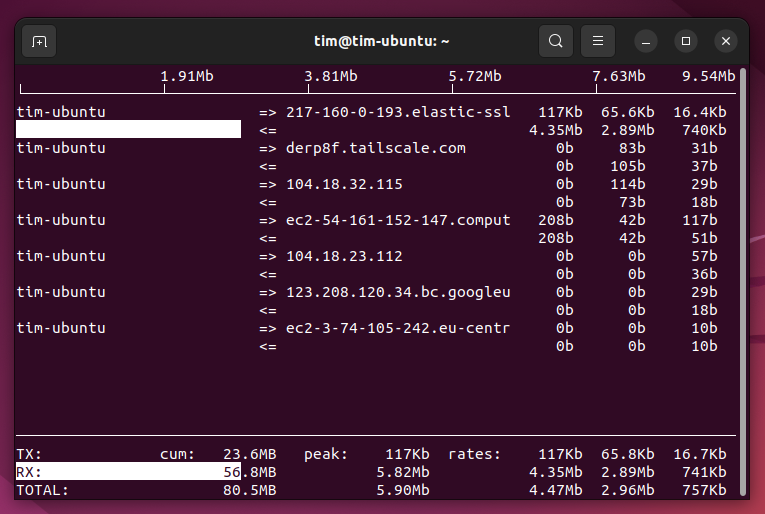
Real-time network performance insights. This powerful command-line tool is an indispensable asset for system and network administrators aiming to keep a vigilant eye on TCP/IP connections and network bandwidth utilization.
What is iftop?
iftop, short for ‘interface top’, functions akin to the well-known Linux utility ‘top’, but with a focus on network activity. It provides a dynamic view of the data flowing through an interface, displaying bandwidth usage on a per-connection basis. This immediate feedback allows users to identify which hosts are consuming the most bandwidth, a crucial aspect in managing network resources efficiently and mitigating potential bottlenecks.
Key Features and Benefits
One of the core strengths of iftop is its simplicity and ease of use. By running a single command, users can observe the incoming and outgoing traffic from and to different hosts. The tool displays information such as the source and destination addresses, the current bandwidth usage, and the total data transferred over a specific period. This visibility is pivotal for troubleshooting network issues, planning bandwidth allocation, and ensuring that critical services have the necessary resources to operate smoothly.
Moreover, iftop offers several customization options to tailor its output to specific needs. Users can filter traffic by port or IP address, view bandwidth usage by network interface, and even display the network activity graphically in a terminal. These features make iftop a versatile tool that can adapt to various network analysis scenarios.
Getting Started with iftop
Installing iftop is straightforward on most Linux distributions.
For Debian-based systems:
sudo apt-get install iftop
Red hat-based distributions:
yum install iftop
Once installed, running iftop is as simple as typing iftop in the terminal. For a more detailed view, users can employ flags such as -i to specify an interface or -n to prevent hostname resolution, enhancing the tool’s performance.
Conclusion
Exploring iftop: The Must-Have Network Monitoring Tool for Linux
In the bustling world of network administration, Linux users are constantly in search of efficient tools to monitor network traffic and bandwidth usage. Amid a plethora of options, iftop emerges as a standout choice for those seeking real-time network performance insights. This powerful command-line tool is an indispensable asset for system and network administrators aiming to keep a vigilant eye on TCP/IP connections and network bandwidth utilization.
What is iftop?
iftop, short for ‘interface top’, functions akin to the well-known Linux utility ‘top’, but with a focus on network activity. It provides a dynamic view of the data flowing through an interface, displaying bandwidth usage on a per-connection basis. This immediate feedback allows users to identify which hosts are consuming the most bandwidth, a crucial aspect in managing network resources efficiently and mitigating potential bottlenecks.
Key Features and Benefits
One of the core strengths of iftop is its simplicity and ease of use. By running a single command, users can observe the incoming and outgoing traffic from and to different hosts. The tool displays information such as the source and destination addresses, the current bandwidth usage, and the total data transferred over a specific period. This visibility is pivotal for troubleshooting network issues, planning bandwidth allocation, and ensuring that critical services have the necessary resources to operate smoothly.
Moreover, iftop offers several customization options to tailor its output to specific needs. Users can filter traffic by port or IP address, view bandwidth usage by network interface, and even display the network activity graphically in a terminal. These features make iftop a versatile tool that can adapt to various network analysis scenarios.
Getting Started with iftop
Installing iftop is straightforward on most Linux distributions. For Debian-based systems, one can install it using apt-get install iftop, while yum install iftop will suffice for Red Hat-based distributions. Once installed, running iftop is as simple as typing iftop in the terminal. For a more detailed view, users can employ flags such as -i to specify an interface or -n to prevent hostname resolution, enhancing the tool’s performance.
Conclusion
For Linux users tasked with monitoring and managing network traffic, iftop is a tool that combines power with simplicity. Its real-time monitoring capabilities provide immediate insights into network performance, making it easier to identify and address issues proactively. Whether you’re a seasoned network administrator or just starting out, iftop is a valuable addition to your toolkit, offering a clear window into the dynamics of your network traffic.
Internet security is an ever-increasing issue for all of us. Let me ask you something. How do you keep track of your passwords? Memorise them all? Yeah, sure. Write them down in a little black book with random passwords and usernames scribbled all over the place? Or maybe use a password manager such as Dashlane, BitWarden etc? How about two-factor authentication?
What if I were to tell you about a, relatively, new way to sign in? Passkeys use public key cryptography to safeguard your accounts but is this better than using any of the above? Well for a start anything is better than memorising all the passwords, they would have to be far too basic and repetitive, and what happens if you lose your device and little black book at the same time? Don’t even think about it.
Passkeys are more secure than both username/password and two-factor authentication (2FA).
It is true. Passkeys are based on public key cryptography. This means that the user has a public key and a private key. The private key is never given to anyone but the public key is available to the website during the registration/login process. When the user wants to sign in, the website sends them a large, never used before, random number which the user signs (encrypts) with their private key. This is then sent to the website which uses the user’s public key to decrypt the number and compares it with the original it sent out. If it matches then the authentication is approved. (Simplified, but you get the idea.)
The point here is that the website never stores any ‘secret’ that belongs to the user so in the event of a breach there is nothing for an attacker to obtain.
Now compare this with traditional logins and two-factor authentication. Both of these require the website to store secrets that belong to the user. The username, hashed password and 2FA key, all of which can be stolen, either from the websites storage servers or in transit as the authentication process takes place.
Passkeys are more convenient – no need to remember passwords or enter codes.
Yes using passkeys is almost too easy and actually feels less secure than 2FA. Usually it is just a case of agreeing to login using your passkeys.
Is it that simple?
Well sadly no. If the website still uses traditional logins as on option to login then a lot of the security gained from using passkeys is naturally lost. During the transition phase as passkeys are, hopefully, fully adopted then this scenario will remain widespread. If you can then try and have this option disabled and have your credentials removed from their servers. Also if you do use a dedicated password manager, two thirds of internet users don’t, then remove the entries for username and password for the account. This will deny attackers of the password manager these credentials.
Setting Up Passkeys
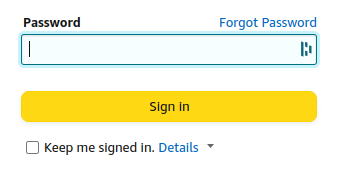
Let’s actually set up a login to Amazon using Passkeys
Log in to your account using Chrome.
Go to Your Account > Login & Security
Scroll down to:
Now follow instructions:
Then supply password for security:
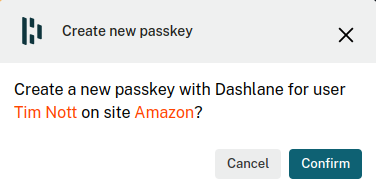
Dashlane, my password manager:
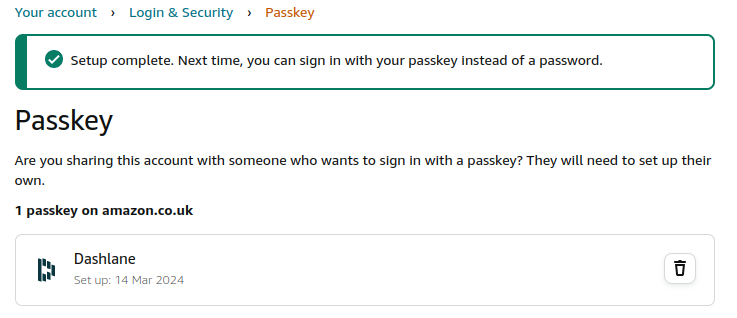
And the setup is complete.
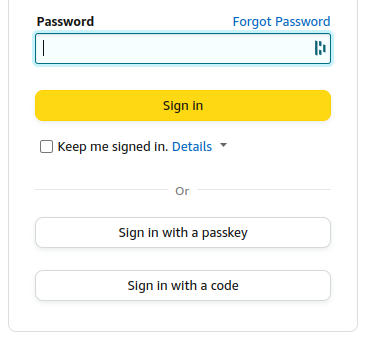
Now when we sign in to Amazon we get the option to use a passkey.
So what are we waiting for?
It is a good question. Passkeys have been around for some time now but the internet is moving slowly in adopting them. At the time of writing Chrome will allow Passkeys for Amazon but Firefox will not. These things take time to mature and for people to feel safe switching to new technologies. Most dedicated password managers are supporting passkeys but not all browsers are. Find out more:
Passkey Support by Major Organizations: A Work in Progress
Here’s a glimpse into the current state of support by some key players:
Apple: A frontrunner in Passkeys, Apple has implemented them in iOS and macOS. You can expect smooth Passkey integration if you use Apple devices and Safari browser.
Google: While not fully rolled out yet, Google is actively developing Passkey support for Chrome and Android. We can expect wider availability from Google soon.
Microsoft: While not directly offering Passkeys yet, Microsoft has a strong focus on passwordless authentication with options like Windows Hello. Their approach might converge with Passkeys in the future.
Browser Support: Support for Passkeys is gradually increasing. Look for updates in popular browsers like Chrome and Firefox. You can check resources like Passkeys.directory for the latest compatibility information: https://passkeys.directory/.
One of the, many, things that bugs me about this world is planned obsolescence. Electronic devices are dropped from support long before the hardware fails or becomes obsolete. My Samsung Galaxy Tab S3 is a prime example of this. It is a nice tablet, OLED screen, decent processor etc but the security updates haven’t been coming since March 2020 and yet it was only released in mid-2017 and they were still selling it in late 2018. So, only two years of full security.
Morals and ethics aside, what can we do about this? I had been thinking of the option of rooting the device and installing a different OS on it for a while, but it is a daunting task full of variables and chances of ruining the device. You can ‘brick’ a device if you get this wrong. As time went on however it became more and more apparent that there was nothing to lose. I dived into the labyrinth of rabbit holes.
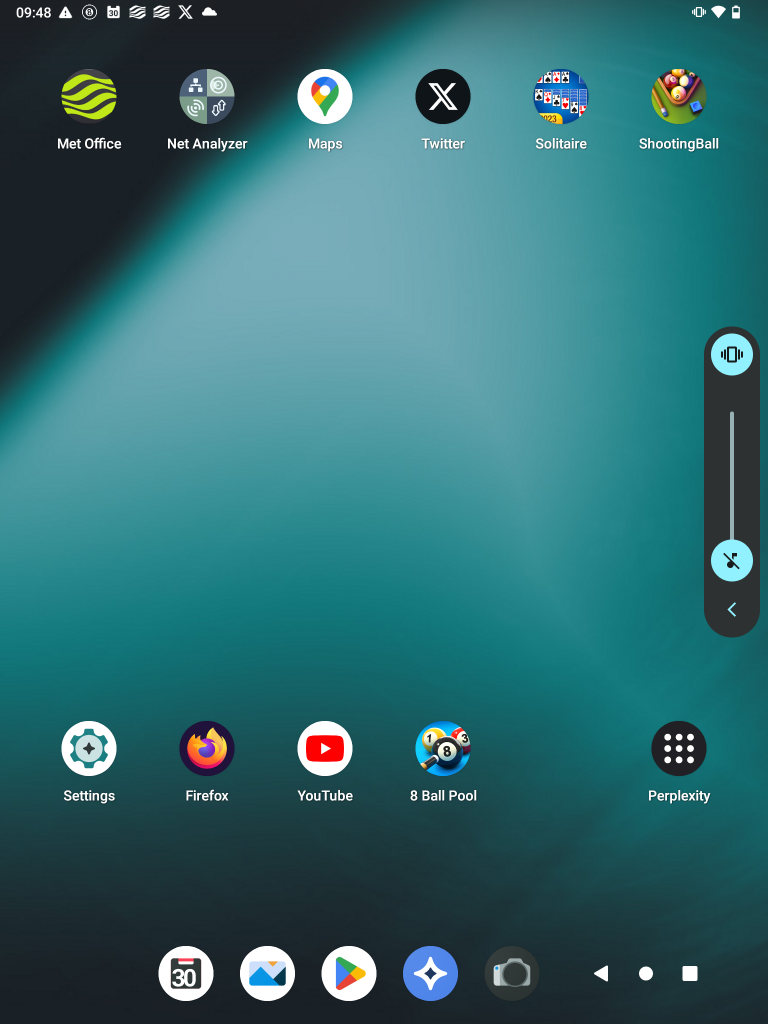
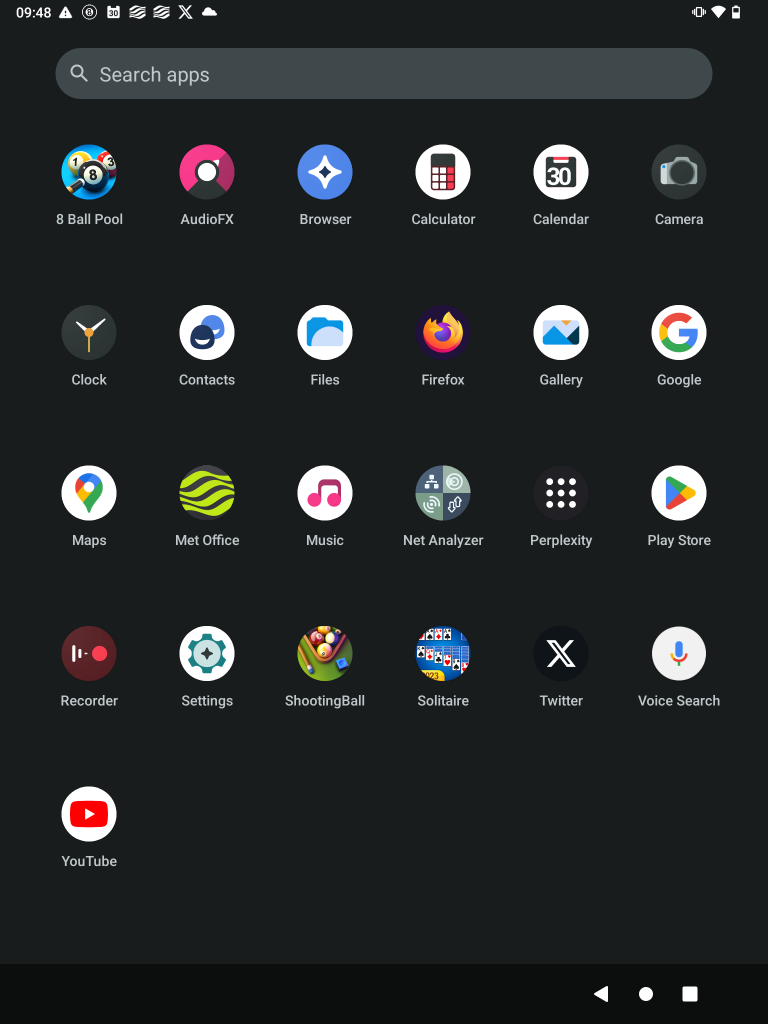
Eventually, after quite a bit of trial and error with different versions of this and that I homed in on a reasonable outcome and learnt a whole lot in the process. I ended up with a functioning tablet with an OS called LineageOS and the Google Play Store enabled by GApps. It functions like Android and you can install the apps you want. It doesn’t have any bloatware, nothing from Samsung and performs like a normal tablet.
At this point I would point out that this is not a step-by-step tutorial but is intended to show the basic process that you would go through. This process will also wipe your device completely and if you get it really wrong you can brick your device. Proceed at your own risk.
The basics of steps I took to achieve this:
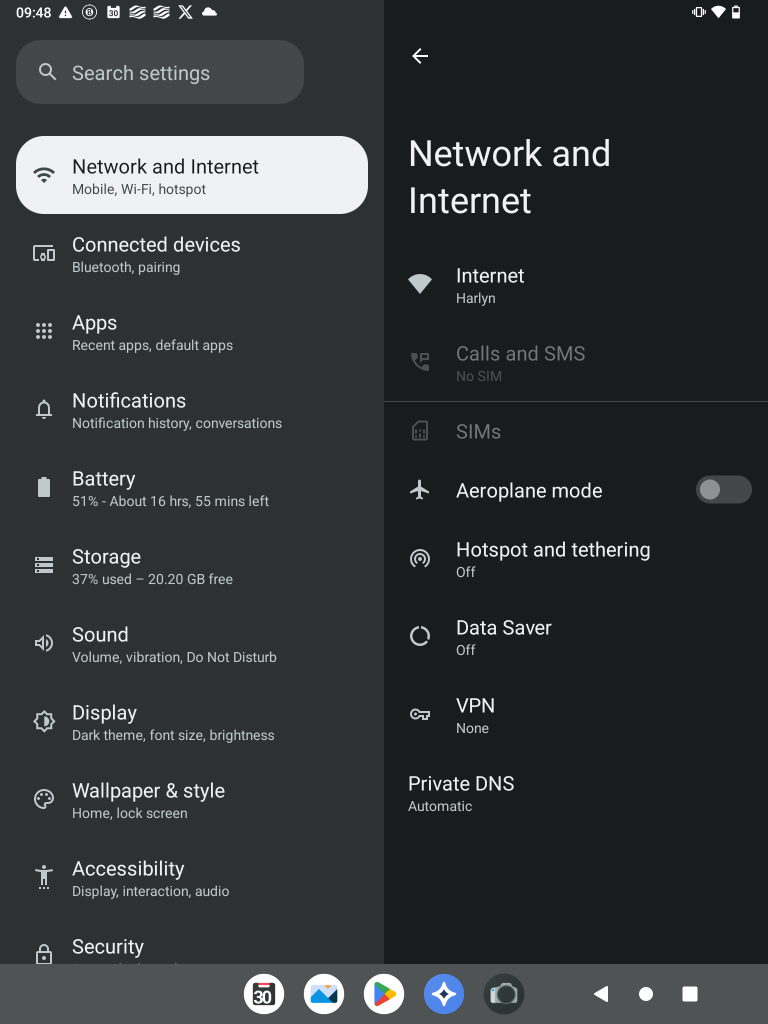
Enable OEM Unlocking and USB Debugging.
Install USB Drivers for the PC.
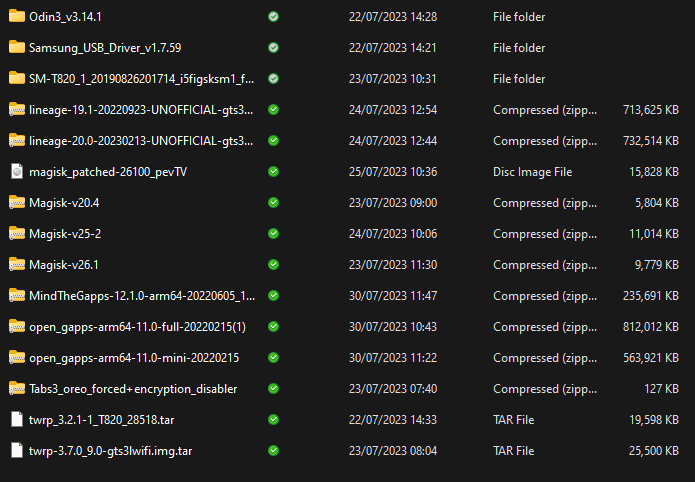
Download: Odin, TWRP, LineageOS 19.1, GApps.
Put device into Download mode.
Connect it to the PC via USB cable.
Open the Odin application.
Click on AP and browse to the TWRP tar file.
Deselect Auto Reboot and press Start.
Wait for ‘PASS!’ confirmation that the TWRP has been flashed to the device.
Now put the device into Recovery mode. This is now the TWRP that we just flashed.
In TWRP, first wipe the device.
Then we mount the device to the PC so we can access the storage.
Transfer the LineageOS and GApps to the device.
Flash the LineageOS to the device using Install.
Then once that is done flash the GApps.
Now we can reboot the system and we will have a clean install of the LineageOS that includes Google Play Store and behaves much like an Android device.
Breaking It Down
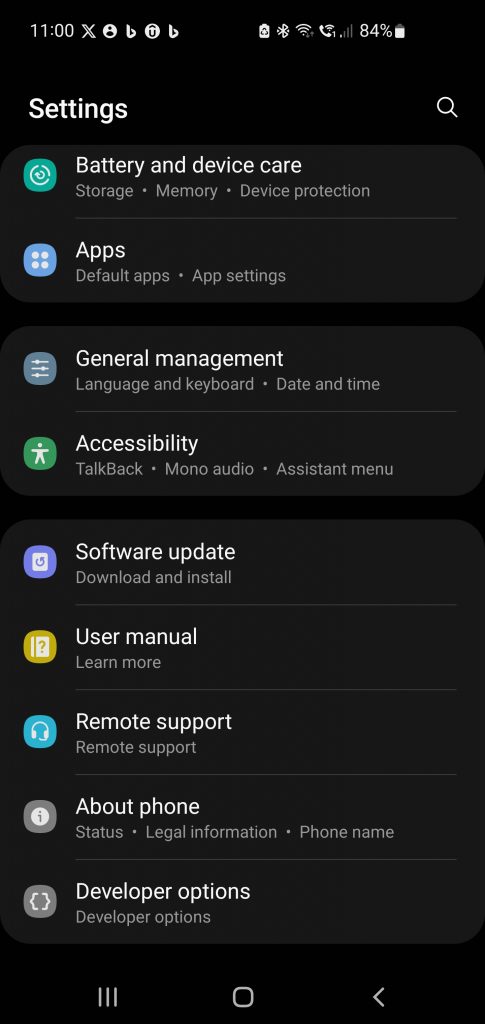
Enable OEM Unlocking and USB Debugging:
In order to flash/install a new recovery software for the device we need to unlock the bootloader, and this is often called OEM Unlocking. To access the device via USB we need to enable USB Debugging. Usually for these options to become available in the settings of the device we need to go into Developer mode which can involve going to About Device > Software Information > and then tap on Build number 7 times. Now Developer Options will be available underneath About Device.
Install USB Drivers for the PC:
This is another step that we need to take to enable our PC to access the device via USB. This is a straightforward procedure. Navigate to the Samsung’s official website and search for the USB drivers for your specific device model. You can also download the Samsung USB drivers directly from many third-party websites, but ensure to choose a reputable one to avoid any potential security issues.
Odin
Odin is a Windows-based software tool developed by Samsung used to flash and install firmware, kernels, and custom recovery images onto Samsung mobile devices. We use it here to install TWRP on the device.
TWRP
TWRP (Team Win Recovery Project) is an open-source, touch-friendly custom recovery software for Android devices that allows users to install third-party firmware and backup their current system with relative ease. We use it to install the LineageOS custom ROM as well as the GApps.
Put Device into Download Mode
This is usually done by a combination of external buttons on the device. On my Tab S3 it is hold Home, Vol Down and then Power button. We put it in this mode so that we can us Odin to install TWRP.
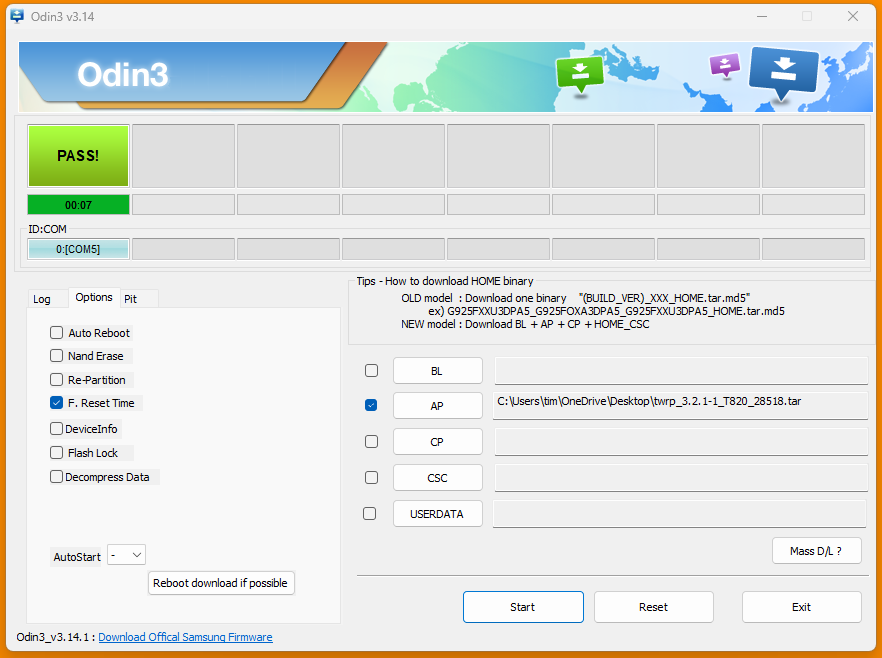
Using Odin to install TWRP
After connecting to the device with USB we then start the Odin application, Select AP (Application Processor. The core system) and browse to the TWRP tar file. It’s important not to reboot now but instead go to the recovery which is now TWRP and not the default recovery installed with Android.
Mount the device
Simple steps in TWRP to mount the device to the PC so we can transfer files to the device.
Flash LineageOS and GApps
LineageOS is the custom ROM that we are installing on the device instead of the official Android firmware. It is based on Android and works in a similar fashion, but it is not developed by large corporations like Google and Samsung but by a smaller but still dedicated group of enthusiasts. GApps is required to install Google elements to the device such as Google Play Store so that we can download and install apps like Maps, Twitter etc.
The Finished Article
Seems simple enough, doesn’t it? Well yes and no. The biggest issue you will have when trying to root your device like this is compatibility. You need to find the most recent version of Odin, TWRP, the right USB drivers, the correct LineageOS version for your device as well as GApps which has multiple sizes, configs and associated Android versions content with.
Some of the files I downloaded:
You will notice a zip file called Magisk in there. Magisk is an app that will root your device without performing a clean install so you can gain more control over your up to date Android OS. This is a whole other chapter to rooting and for another day.
An example of using AI and a traditional method of troubleshooting an IT problem.
Table of Contents
Introduction
The Problem
Enter the CompTIA Troubleshooting Method
Enter ChatGPT
Testing The Theories
Conclusion
Introduction
We are going to see how we can combine an AI chatbot, in this case ChatGPT, and a traditional method of troubleshooting, CompTIA Troubleshooting Method, to fix a problem. The idea is to improve our efficiency and efficacy by using AI.
The Problem
Fortnite crashes during the loading screen between games on Fortnite.
Additional Information:
Fortnite crashes during the loading screen between games
Recently installed 2nd hand graphics card – RX5500 XT
Main suspect is the GPU, but the stress test doesn’t cause any problems
System specs exceed game requirements
Coincides with new chapter of Fortnite released
Other games played without issue
Never crashes in game when resources are most stressed
Once the PC has crashed it is unreachable via ping or RDP which suggests that it’s not just a case of the GPU failing
Since this PC has just had its GPU replaced with a more powerful but used model this is the primary suspect for the problem but there could be many other issues such as the version of Fortnite just released and more. What is curious about this problem is that it occurs inbetween games and also when you enable the Task Switcher feature on Windows (alt-tab).
Enter the CompTIA Troubleshooting Method
Identify the Problem: Gather information from the user, perform an initial analysis, and duplicate the problem if possible. Identify symptoms and potential causes.
Establish a Theory of Probable Cause: Considering the information you have gathered, hypothesize a likely cause of the issue.
Test the Theory to Determine Cause: Once a theory is in place, test it to see if it’s the actual cause of the problem. If the theory is confirmed, identify the next steps to resolve the problem. If not, establish a new theory or escalate.
Establish a Plan of Action to Resolve the Problem and Implement the Solution: Implement the solution or plan of action and verify that it has resolved the problem. This might involve repairing a faulty component, updating software, or other actions.
Verify Full System Functionality and Implement Preventive Measures: After the issue is resolved, confirm that the entire system is working as expected. Also, implement any preventive measures if necessary to prevent the problem from happening again.
Document Findings, Actions, and Outcomes: Make a record of what you found, what you did, and what the result was. This can help in troubleshooting future problems and is a good practice for maintaining IT systems.
Enter ChatGPT
So, we can use ChatGPT to provide us with as many theories as possible on what the problem is. This is something that the chatbot excels at with it’s knowledge base on many other documented problems similar to ours:
Here are a few possible reasons why your PC might be crashing during the loading screen between games in Fortnite:
Graphics Card Driver Issues: The issue might be related to your graphics card drivers. It’s worth trying to update them to the latest version, or if the problem started after a recent update, you might consider rolling back to a previous version.
Game Files Corruption: Sometimes, game files can become corrupted, which can cause crashes. Try verifying the integrity of your game files. In Epic Games Launcher, you can do this by clicking on the gear icon next to the Fortnite thumbnail, and then clicking “Verify”.
Insufficient System Resources: If your system is running out of RAM or disk space, this could cause the game to crash. Close unnecessary applications running in the background to free up some system resources.
Overheating: Overheating can cause all sorts of problems, including game crashes. Monitor your system temperatures while you’re playing to see if overheating might be the issue. If so, you might need to clean out your system, reapply thermal paste, or improve your cooling setup.
Hardware Issues: Problems with your actual hardware (like your graphics card, RAM, etc.) can cause crashes. You might consider running some hardware diagnostic tools to check for issues.
Software Conflicts: Other software running on your computer (like antivirus programs) could potentially cause conflicts leading to crashes. Try temporarily disabling these types of programs to see if that fixes the issue.
Game Settings: Sometimes, in-game settings can cause crashes if they’re set too high for your system to handle, or if there’s a particular setting your system doesn’t handle well. Try lowering your settings or changing them to see if that resolves the crashes.
Outdated Game Version: If your game is not updated to the latest version, it might cause some instability issues such as crashes. Make sure Fortnite and the Epic Games Launcher are updated to the latest version.
In addition to these I prompted the AI to focus on the fact that these crashed occurred in during the loading screen in particular and give me more theories:
Disk I/O issues: The loading screen between games is usually where new game data is being loaded from your storage into memory. If there are issues with your hard drive or SSD, such as bad sectors, it could cause the game to crash during this process.
RAM issues: The data is loaded into RAM during this time, so if there are issues with your RAM (like bad memory modules), it could cause crashes. Try running a memory diagnostic tool to check for problems.
Game file corruption: If certain game files that are needed during the transition between games are corrupted, this could cause the game to crash when it tries to load these files. As previously mentioned, verifying the integrity of your game files might help.
Graphics Settings or Driver Issues: Even though the loading screen is less demanding overall, it might use certain graphical effects or functions that aren’t used elsewhere. If your GPU drivers have issues with these specific effects, it could cause a crash.
Resource Allocation Shift: When transitioning between games, the application is likely deallocating and reallocating resources (like memory). If there’s an issue with how this is handled, either due to a bug in the game or a problem with your system’s hardware, this could cause a crash.
File Loading Issues: During loading screens, the game is often loading assets from your hard drive. If there’s a problem with your hard drive or the game files themselves, this could cause a crash.
Graphics Rendering Change: The rendering during gameplay might be handled differently than the rendering during loading screens. If your graphics card has issues with the rendering mode used in loading screens, this could cause a crash.
Network Requests: Sometimes, during loading screens, games will make network requests (like loading player stats, matchmaking, etc.). If there’s a problem with your network connection or the game’s servers, this could potentially cause a crash.
Game Bugs: Sometimes games have specific bugs that cause crashes under certain conditions. It’s possible there’s a bug in the game that’s causing this issue.
Shader Compilation: Some games compile shaders during loading screens. If there’s an issue with the shaders, or if your GPU has problems compiling them, it could result in a crash.
Memory Leaks: If the game has a memory leak, it might not become apparent until you’ve played a few games in a row. The transition between games could be when the leak finally causes a crash.
ChatGPT
We have nearly 20 theories on what the problem might be so we can make our own list, making a judgement on what are the priority theories to test.
Drivers – try the 6/1/2023 release. Use Clean Up Utility first. If that fails, then try to roll back to previous version.
Game settings – experiment with low graphics settings. First try preset to Low. Then try DX11.
Run as Admin.
Verify games files – Use the EPIC games Verify feature.
Problematic software release – a new chapter for Fortnite has just been released and maybe the PC version is buggy?
Overheating – GPU does not appear to overheat during game or stress test. At the loading screen where the crash usually occurs, the resources are not under load and temperature consequently is not a problem. Check CPU temperatures. Buy thermal paste and redo CPU.
Hardware issues – find diagnostic tools to test all the hardware, particularly the RAM. GPU has been stress-tested multiple times now so presumably it is functioning as it should. Try removing RAM.
Software conflicts – disable all background applications in Task Manager > Start up.
Windows security – experiment with turning off the firewall and anything else that is possible to turn off and see if this helps. Not good to have these off for extended periods though.
Disk I/O – check the SSD for bad sectors.
Resource Allocation Shift – there does not seem to be anything in this which is not covered elsewhere in this list.
Network Requests: Sometimes, during loading screens, games will make network requests (like loading player stats, matchmaking, etc.). If there’s a problem with your network connection or the game’s servers, this could potentially cause a crash.
Shader Compilation: Some games compile shaders during loading screens. If there’s an issue with the shaders, or if your GPU has problems compiling them, it could result in a crash.
Visual C++ Distributables
Compatibility – set to Windows 8.
Packet loss – in terminal: -limitclientticks. Has potential drawbacks such as slower data transfer to and from the server.
Testing The Theories
Now we can try to test and resolve these theories in turn.
Drivers – In the Adrenalin app the driver is stated as up to date. To be sure the driver and software were uninstalled, and the AMD Cleanup Utility used prior to reinstalling.
Game settings – various experiments conducted with the settings turned down, DX11 vs DX 12 etc.
Run as Admin – done.
Verify game files – the feature in the EPIC games launcher was ran twice and appeared to download some data. No feedback is given at the end of the process
Problematic software release – unable to control this until EPIC release the first update.
Overheating – Temperatures were checked with various software and feature and the thermal paste was reapplied to the CPU. Fan settings were set to maximum in UEFI.
Hardware issues – the GPU was stress tested for 5 minutes using the AMD software. Different sets and configurations of RAM were tested.
Software Conflicts – everything has been disabled at Start Up.
Windows Security – due to security issues with turning off Windows Defender for extended periods of time needed to test an intermittent system crash, testing this theory was held back.
Disk I/O – checked the SSD for bad sectors using the feature in Windows 10.
It was at this stage in proceedings that EPIC released the first update for this chapter of Fortnite and since then there have been no crashes. Fortnite is primarily a console application and possibly the PC version gets fewer resources and consequently was buggy. In the end it was a factor that was out of our control, but we achieved the desired result. Web searches for Fortnite crashes did not produce information about this being a problem with other users and with so many other theories, most of them plausible, this one didn’t get the attention it maybe deserved. Hindsight is a great thing.
Conclusion
We have seen how we can use AI to enhance our workflow and efficiency. Within a few minutes the bot has produced nearly twenty theories and that means we can move on to the testing stage much quicker. Also, we can use the AI to suggest procedures for testing/resolving the theories. Game crashes may not be enterprise level issues, but the principle is sound.
Creating a shared folder on a Linux machine and accessing it from Windows machines on the same network involves setting up Samba on the Linux machine and configuring the Windows machine to access the shared folder. This is because Linux doesn’t have Server Message Block(SMB) natively.
Here is a step-by-step procedure:
Install Samba on the Linux machine
Open a terminal window.
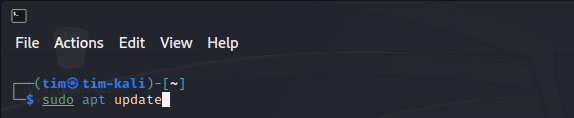
Update the package list by running:
sudo apt update
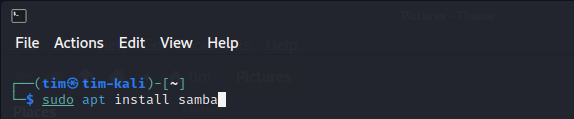
Install Samba by running:
sudo apt install samba
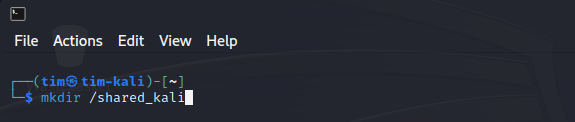
Create a shared folder
In the terminal, create a new directory for sharing:
mkdir /path/to/shared/folder
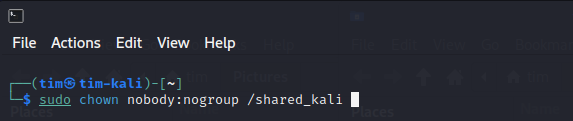
Change the ownership of the shared folder to the ‘nobody’ user and ‘nogroup’ group:
sudo chown nobody:nogroup /path/to/shared/folder
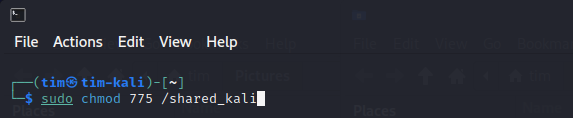
Set the appropriate permissions:
sudo chmod 775 /path/to/shared/folder
Configure Samba
Create a backup of the original Samba configuration file:
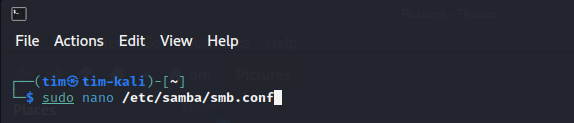
Open the Samba configuration file in a text editor:
sudo nano /etc/samba/smb.conf
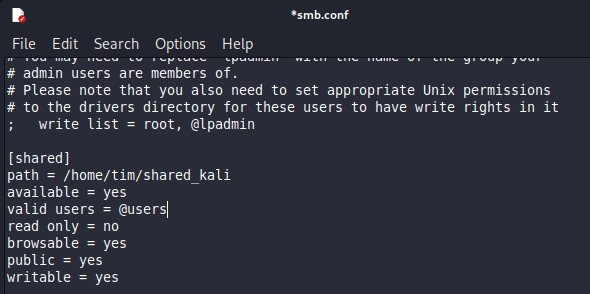
Add the following configuration block to the end of the file:
[SharedFolder]
path = /path/to/shared/folder
available = yes
valid users = @users
read only = no
browsable = yes
public = yes
writable = yes
Replace ‘SharedFolder’ with the name for your shared folder and /path/to/shared/folder with the path of the shared folder.
Save the changes and exit the text editor (Ctrl + X, then Y, then Enter in nano).
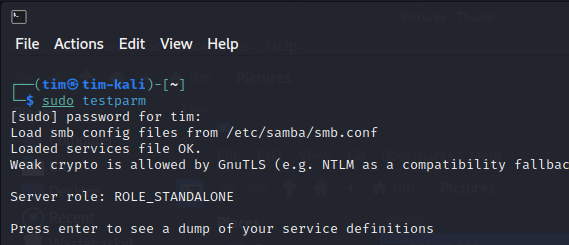
Test the Samba configuration for any syntax errors:
sudo testparm
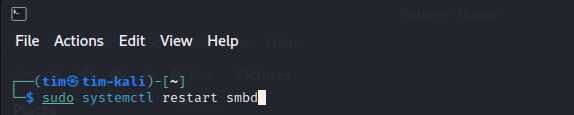
Restart the Samba service:
sudo systemctl restart smbd
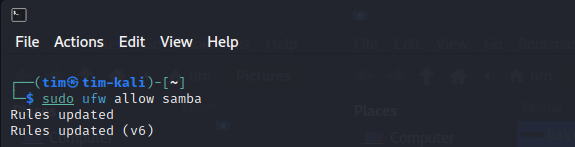
Configure the firewall (optional, if using a firewall)
Allow samba through the firewall:
sudo ufw allow samba
Enable the firewall, if not already enabled:
sudo ufw enable
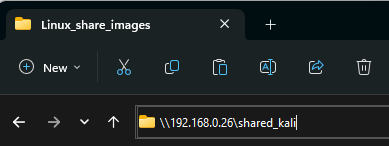
Access the shared folder from a Windows machine
On the Windows machine, open File Explorer.
Click in the path field near the top.
Enter:
\\<ip address of Linux machine>\<name of shared folder>
Press Enter
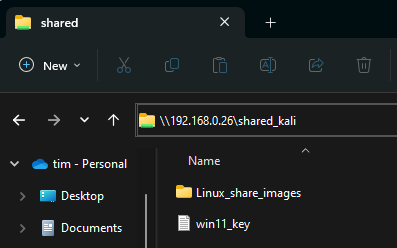
Enter the Linux machine’s ‘nobody’ user credentials, if prompted (the password is typically left blank).
You should now be able to access the shared folder on the Linux machine from the Windows machines on the same network.
In conclusion, sharing files between Linux and Windows machines is a crucial aspect of working in a multi-platform environment. By following the steps provided in this guide, you can seamlessly set up a shared folder on your Linux machine and access it from Windows machines on the same network. Samba serves as an effective bridge between these two operating systems, enabling smooth file sharing and collaboration. With a properly configured shared folder, you can enjoy the benefits of cross-platform collaboration and improve the overall efficiency of your network.
We’ve all heard stories of people losing their phones and being locked out of their important accounts. If you’re using Google Authenticator for multi-factor authentication (MFA) on your accounts, losing your phone can be a real nightmare. But don’t worry, there’s a simple solution: creating backup codes for your Google account. This blog post will walk you through the process, step-by-step.
Why Backup Codes Are Essential
Google Authenticator is an excellent tool for increasing the security of your online accounts. However, it relies on your smartphone, which can be lost, stolen, or damaged. Without access to your phone, you may find yourself locked out of your accounts, potentially losing valuable data or causing disruptions to your life.
This is where backup codes come in. These codes act as a backup for your MFA, allowing you to access your accounts even if your phone is unavailable. They’re essential for anyone using Google Authenticator and can save you from a world of frustration.
Creating Backup Codes for Your Google Account
Follow these steps to create backup codes for your Google account:
Click on your avatar (profile picture) in the top-right corner of the page.
Select ‘Manage your Google Account’ from the dropdown menu.
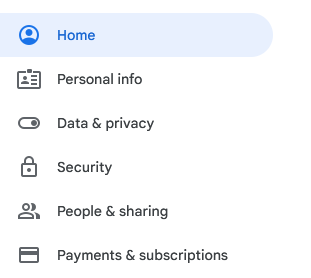
Navigate to the ‘Security’ tab located on the left side of the screen.
Scroll down to the ‘Signing in to Google’ section and click on ‘2-Step Verification.’
If you haven’t set up 2-Step Verification yet, follow the on-screen instructions to enable it. If you have already set it up, proceed to the next step.
Scroll down to the ‘Backup codes’ section, and click on ‘Show codes’ or ‘Set up.’
You may be prompted to re-enter your Google account password for security purposes. Enter your password and click ‘Next.’You will now be presented with a list of ten 8-digit backup codes. Save these codes in a secure location, such as a password manager(one that does not use Google Authenticator for MFA), or a physical safe.
The Importance Of Using Back Up Codes
Each backup code can be used only once. Once you’ve used a code, it will become invalid.
If you use up all your backup codes, you can generate a new set by following the same steps outlined above.
Make sure to store your backup codes in a secure location, separate from your phone. This ensures you can access them even if your phone is lost or damaged.
Consider creating backup codes for other accounts that offer MFA as well, not just your Google account. This will provide an extra layer of security for your online life.
In case you do lose your phone and need to recover access to your Google Authenticator, follow these steps:
Install Google Authenticator on your new phone: If you’ve lost your phone or have a new phone, you’ll need to reinstall Google Authenticator on the new device. You can download the app from the Google Play Store (for Android devices) or the App Store (for iOS devices).
Enter your email address: Type in the email address associated with the lost phone and click ‘Next.’
Provide your Google account password: Enter your password, and click ‘Next.’
Select ‘Try another way’: Since you don’t have access to the Google Authenticator app on the lost phone, choose ‘Try another way’ when prompted for a verification code.
Use backup codes or alternative verification methods: If you’ve previously created backup codes for your Google account, you can use one of these codes to verify your identity. If you haven’t created backup codes or have used them all, you can try using alternative verification methods, such as receiving a text message or a phone call to a registered phone number or answering security questions.
Regain access to your account: After successfully verifying your identity, you’ll regain access to your Google account.
Set up Google Authenticator on the new phone: Once you have access to your account, go to the ‘Security’ tab in your Google Account settings. Scroll down to the ‘Signing in to Google’ section, and click on ‘2-Step Verification.’ Then, click on ‘Change Phone’ in the ‘Authenticator app’ section. Follow the on-screen instructions to set up Google Authenticator on your new phone.
Remove the lost phone from your account: To ensure the security of your account, it’s essential to remove the lost phone from your list of trusted devices. In the ‘Security’ tab, scroll down to ‘Your devices,’ click on ‘Manage devices,’ and remove the lost phone from the list.
By following these steps, you can recover access to your Google Authenticator after losing your phone and ensure your account remains secure. It’s always a good idea to create backup codes and store them safely to avoid any future inconveniences.
To provide the best experiences, we use technologies like cookies to store and/or access device information. Consenting to these technologies will allow us to process data such as browsing behaviour or unique IDs on this site. Not consenting or withdrawing consent, may adversely affect certain features and functions.
Functional
Always active
The technical storage or access is strictly necessary for the legitimate purpose of enabling the use of a specific service explicitly requested by the subscriber or user, or for the sole purpose of carrying out the transmission of a communication over an electronic communications network.
Preferences
The technical storage or access is necessary for the legitimate purpose of storing preferences that are not requested by the subscriber or user.
Statistics
The technical storage or access that is used exclusively for statistical purposes.The technical storage or access that is used exclusively for anonymous statistical purposes. Without a subpoena, voluntary compliance on the part of your Internet Service Provider, or additional records from a third party, information stored or retrieved for this purpose alone cannot usually be used to identify you.
Marketing
The technical storage or access is required to create user profiles to send advertising, or to track the user on a website or across several websites for similar marketing purposes.